Tropical Rib Button Scarf Free Crochet Pattern
Introduction
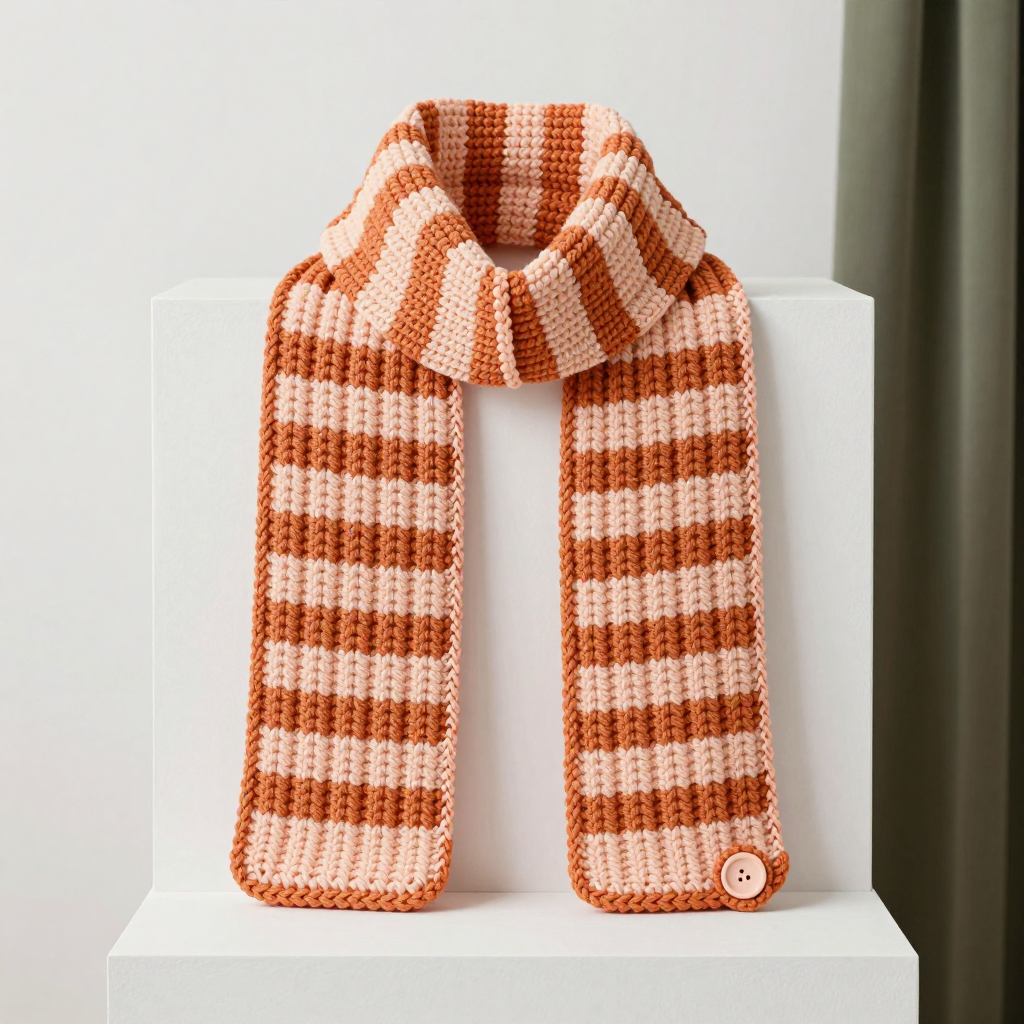
This Tropical Rib Button Scarf is a sweet, speedy little project that's perfect for new crocheters ready to try something a bit more textured than plain single crochet. Worked in soft bulky wool with alternating peach and apricot stripes, it uses front and back post stitches to create a cozy vertical ribbing that looks impressive but is really just double crochet in disguise. At about 4 inches wide and 26 inches long, it's sized just right for children ages 3 to 8, and the simple crocheted loop and chunky button make it easy for little hands to fasten all by themselves. The finished scarf feels squishy and warm, drapes flat around the neck, and works up quickly enough to finish in a weekend.
Materials Needed
- Yarn: Bulky weight (weight category 5) wool, approx. 100 g total: 50 g peach (Color A) and 50 g apricot (Color B).
- Hook: 6.0 mm (US J-10) crochet hook.
- Notions: Tapestry needle for weaving in ends, one chunky button (about 1 inch / 25 mm), scissors.
- Finished size: Approx. 4 inches (10 cm) wide x 26 inches (66 cm) long; fits children ages 3-8.
Abbreviations
- ch - chain: make a loop of yarn and pull it through the loop on your hook.
- dc - double crochet: yarn over, insert hook, pull up a loop, yarn over and pull through two loops, yarn over and pull through the last two loops.
- fpdc - front post double crochet: work a double crochet around the post of the stitch below, inserting your hook from front to back to front so the stitch pops forward.
- bpdc - back post double crochet: work a double crochet around the post of the stitch below, inserting your hook from back to front to back so the stitch sits behind.
- sc - single crochet: insert hook, pull up a loop, yarn over and pull through both loops.
- sl st - slip stitch: insert hook, yarn over, and pull through both the stitch and the loop on your hook at once.
- rep - repeat.
- st(s) - stitch(es).
Gauge
12 stitches x 12 rows = 4 inches (10 cm) in post stitch ribbing pattern. To check, crochet a small swatch in the pattern and measure a 4-inch section; if you have more stitches than 12, go up a hook size, and if you have fewer, go down.
Tips Before You Start
- Keep your turning chains loose. A tight ch 2 at the start of each row makes the scarf edges pull in and curl.
- Post stitches are easier to read as you go: the fpdc bumps sit toward you and the bpdc bumps sit away from you. If your ribbing looks flat, check that you're alternating them correctly.
- Change colors on the last yarn-over of the final stitch of a row so the new color starts cleanly at the beginning of the next row.
- Carry the unused color loosely up the side edge rather than cutting it each time, then hide the floats under the optional edging.
Step-by-Step Instructions
The scarf is worked lengthwise in rows, so the ribbing runs along its length.
Scarf Body
With Color A, ch 14.
Row 1: Dc in 4th ch from hook (the skipped 3 ch count as the first dc), dc in each ch across (12 dc). Turn.
Row 2: Ch 2 (counts as first dc), *fpdc around next st, bpdc around next st; rep from * to last st, dc in last st. Turn (12 sts).
Rows 3-12: Rep Row 2, maintaining the rib pattern (12 sts). Change to Color B.
Rows 13-24: Rep Row 2 (12 sts). Change to Color A.
Rows 25-36: Rep Row 2 (12 sts). Change to Color B.
Rows 37-48: Rep Row 2 (12 sts). Change to Color A.
Rows 49-60: Rep Row 2 (12 sts). Change to Color B.
Rows 61-72: Rep Row 2 (12 sts). Change to Color A.
Rows 73-78: Rep Row 2 (12 sts). Fasten off.
Button Loop
With Color A, join yarn at one short end of the scarf. Ch 10, then sl st to the same short end to form a loop. Fasten off.
Button
Sew the chunky button to the opposite short end of the scarf, aligning it with the button loop.
Edging (Optional)
With Color B, join yarn at any edge. Sc evenly around the entire scarf, working 3 sc in each corner. Fasten off.
Assembly and Finishing
There's no seaming needed for this scarf since it's worked as one flat piece. Weave in all ends neatly on the wrong side, using the tapestry needle to tuck them along the edge so they don't show through the ribbing. If you worked the optional edging, make sure the corner stitches lie flat and aren't bunched. Block the scarf lightly by misting it with water and pinning it to the finished measurements (4 inches x 26 inches); let it dry completely, which helps the ribbing settle and the edges lie straight. Finally, check that the button passes easily through the loop and adjust the loop size if needed.
Pro Tips and Variations
- Make an adult version by chaining more stitches for width and repeating more color blocks for length, keeping the same stripe sequence.
- Swap the button for a larger wooden toggle or use a contrasting color for a playful pop.
- Try working the edging in Color A instead of B for a subtle outline that frames the stripes.