Retro Ripple Stitch Swatch: Free Crochet Pattern
Retro Ripple Stitch Swatch: Free Crochet Pattern
Introduction
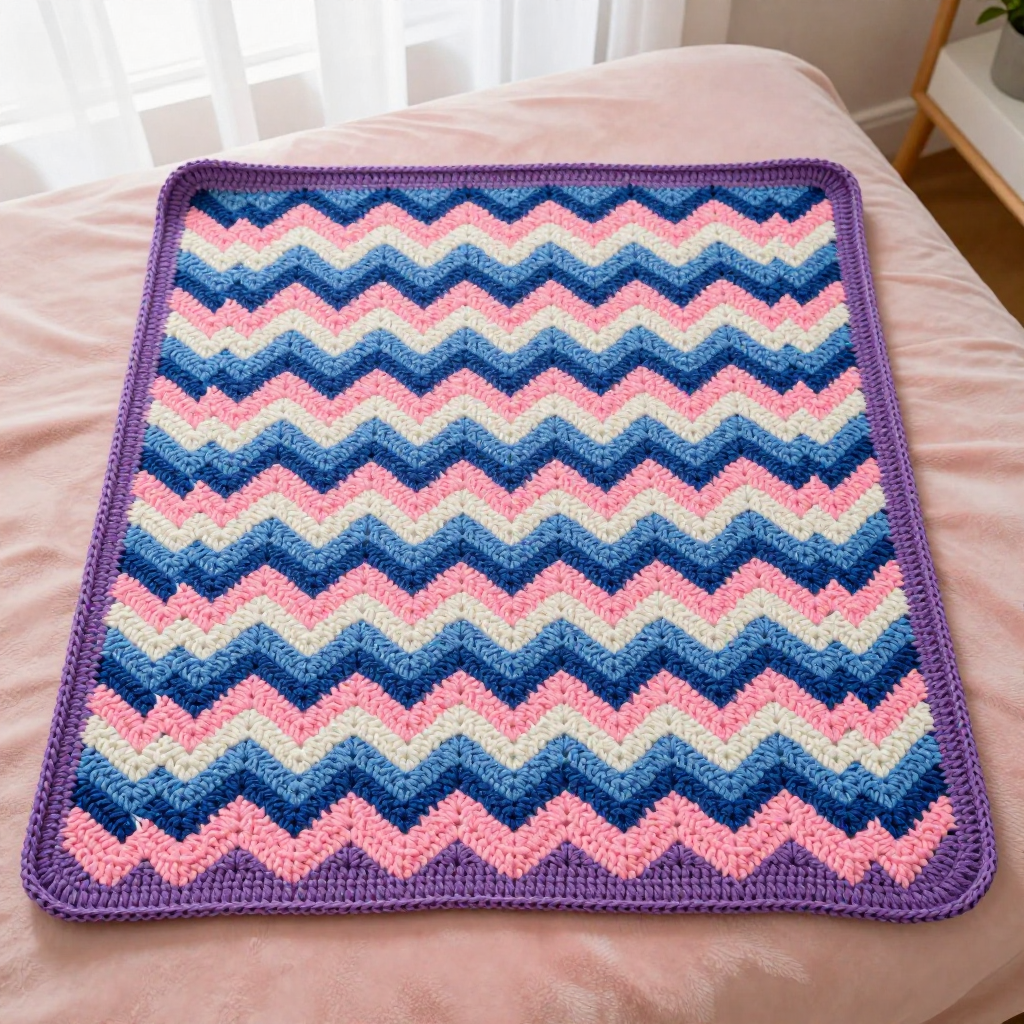
This little ripple swatch is the perfect first taste of chevron crochet — a wavy, zigzag fabric that looks far more complicated than it actually is. It's written for advanced beginners who are comfortable with single crochet and ready to learn how increases and skipped stitches create those rolling peaks and valleys. Worked in purple, pink, and blue stripes (or one self-striping cake), it has a soft, squishy worsted-weight texture with a tidy single crochet border that keeps every edge crisp. At about 8 inches wide and 6 inches tall, it's a quick weekend make that doubles as a coaster, a washcloth, or the start of a bigger ripple blanket.
Materials Needed
- Yarn: Worsted weight (4) yarn, acrylic or cotton, in self-striping yarn or three colors — purple (A), pink (B), and blue (C). Approx. 50 yds total.
- Hook: 5.0 mm (H-8) crochet hook
- Notions: Tapestry needle for weaving in ends, scissors, and a stitch marker (optional, for the first stitch of each row)
- Finished size: Approx. 8 inches wide x 6 inches tall
Abbreviations
- ch — chain: yarn over and pull through the loop on your hook.
- sc — single crochet: insert hook in stitch, yarn over, pull up a loop, yarn over, pull through both loops.
- sk — skip: leave the next stitch(es) unworked.
- st(s) — stitch(es)
- rep — repeat
- sl st — slip stitch: insert hook, yarn over, pull through everything on the hook.
Gauge
14 sts and 8 rows = 4 inches in the ripple pattern. To check, crochet a small sample and measure a 4-inch section across the middle of the fabric; adjust your hook size if your stitches fall outside this range.
Tips Before You Start
- Count as you go. Every row should end with 34 stitches. The 3-sc groups at the peaks and the skipped stitches at the valleys are what keep the count steady — if a row comes up short, check those two spots first.
- Change color cleanly. Change color every 2 rows by finishing the last stitch of the row with the new color, then carry on. This hides the join neatly at the edge.
- Keep your tension even. Ripple fabric can pull in at the peaks; relax your hands slightly when working the 3-sc groups so the waves stay flat.
- Mark the first stitch. Placing a stitch marker in the first sc of each row makes it easy to see where the next row begins after the turning chain.
Step-by-Step Instructions
Swatch (worked in stripes of A, B, C, or with self-striping yarn)
Setup: With Color A, ch 36.
Row 1: Sc in 2nd ch from hook, sc in next 3 ch, *3 sc in next ch, sc in next 4 ch, sk 2 ch, sc in next 4 ch, rep from * to last 5 ch, 3 sc in next ch, sc in last 4 ch. Turn. (34 sts)
Row 2: Ch 1, sc in first 4 sts, *3 sc in next st, sc in next 4 sts, sk 2 sts, sc in next 4 sts, rep from * to last 5 sts, 3 sc in next st, sc in last 4 sts. Turn. (34 sts)
Rows 3–12: Rep Row 2, changing color every 2 rows if using separate colors (A, B, C, A, B, C). Fasten off. (34 sts each row)
Border
Border Rnd 1: With right side facing, join any color to any corner. Ch 1, sc evenly around entire piece, working 3 sc in each corner. Join with sl st to first sc. Fasten off.
Assembly and Finishing
No seaming is needed — this swatch is worked in one piece. Weave in all ends on the wrong side with your tapestry needle, running each tail through a few stitches in two directions so it stays put. Block lightly by misting the swatch with water, pinning it to an 8 x 6 inch rectangle on a towel or blocking mat, and letting it dry flat; this opens up the ripple texture and straightens the border. Trim any remaining tails after blocking.
Pro Tips and Variations
- Make it a set: Work the same pattern in cotton to create matching washcloths or coasters — just repeat the swatch as many times as you like.
- Go bigger: Chain a multiple of 12 plus 4 to widen the ripple and turn the swatch into a scarf or baby blanket, repeating Row 2 until you reach your desired length.
- Play with color: Try a solid border in a contrasting shade, or use a self-striping cake so the color changes happen on their own for a true Y2K look.