Lilac Braided Cable Crochet Swatch Free Pattern
Introduction
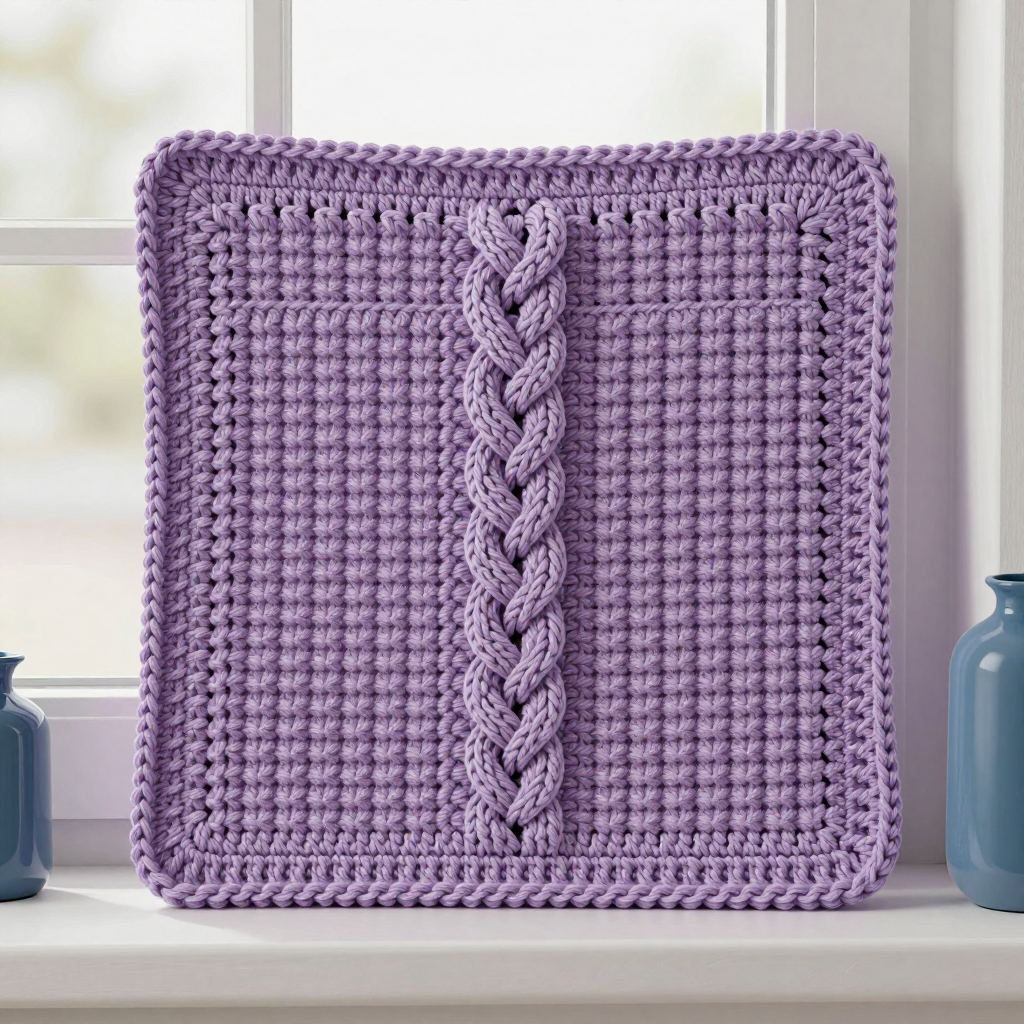
This lilac braided cable swatch is a lovely little project for anyone who has mastered single crochet and is ready to try front-post stitches for the first time. It is a small, flat 6-inch square that showcases a raised braided cable running vertically down the center, framed by smooth single crochet borders on each side. Worked in soft worsted weight acrylic, the finished swatch feels plush and squishy, with the cable ridges standing proud of the flat background for a wonderfully textured look. It is the perfect practice piece before you tackle a full cabled blanket or garment, and it makes a charming coaster or afghan square all on its own.
Materials Needed
- Yarn: Worsted weight (4) yarn, 100% acrylic, lilac — approximately 30 yards
- Hook: 5 mm (H/8) crochet hook
- Notions: Tapestry needle for weaving in ends, scissors, and a stitch marker (optional)
- Finished size: Approximately 6 inches x 6 inches
Abbreviations
- ch — chain
- sc — single crochet
- Fptr — front post treble crochet: work a treble crochet around the post of the indicated stitch two rows below, bringing the hook from front to back to front so the new stitch sits in front of the fabric
- sk — skip
- st(s) — stitch(es)
- sl st — slip stitch
- [ ] — repeat the instructions inside the brackets the number of times stated
Gauge
13 stitches x 13 rows = 4 inches in pattern. To check, work a small sample of single crochet rows with the cable stitches and measure a 4-inch section; adjust your hook size if needed to match.
Tips Before You Start
- Keep your tension relaxed on the Fptr stitches — pulling them too tight will make the cable ridges pucker and distort the square.
- Count your stitches at the end of every row; the cable rows should always total 21 stitches so the borders stay even.
- Work the Fptr around the post of the stitch two rows below, not into the top of the stitch, so the cable sits in front of the fabric.
- Use a stitch marker to flag the first Fptr of each cable row if you tend to lose your place in the repeat.
Step-by-Step Instructions
Main Panel
Foundation: Ch 22.
Row 1: Sc in 2nd ch from hook and in each ch across (21 sc).
Row 2: Ch 1, turn. Sc in each st across (21 sc).
Row 3: Ch 1, turn. Sc in first 6 sts, [Fptr around next st 2 rows below, sk next st, sc in next st] 4 times, Fptr around next st 2 rows below, sk next st, sc in last 6 sts (21 sts).
Row 4: Ch 1, turn. Sc in each st across (21 sc).
Rows 5–19 (odd rows): Ch 1, turn. Sc in first 6 sts, [Fptr around next Fptr 2 rows below, sc in next sc] 4 times, Fptr around next Fptr 2 rows below, sc in last 6 sts (21 sts).
Rows 6–20 (even rows): Ch 1, turn. Sc in each st across (21 sc).
Border
Border round: Ch 1, do not turn. Work sc evenly around the entire piece, working 3 sc in each corner. Join with sl st to first sc. Fasten off.
Assembly and Finishing
This swatch is worked as a single flat piece, so no seaming is required. Weave in all ends neatly on the wrong side with your tapestry needle, threading each tail through a few stitches to secure it. Block the square lightly by misting it with water and pinning it to a 6-inch square on a blocking mat; let it dry completely so the cable ridges relax and the edges lie flat and even.
Pro Tips and Variations
- Try a cotton or cotton-blend worsted yarn for a crisper, more defined cable that holds its shape well as a coaster.
- Work the square in a contrasting color border for a framed look, or change colors every few rows for a striped effect.
- Repeat the panel to make a set of matching squares and join them into a small blanket or pillow front.