Pastel Peony Wide-Brim Hat Free Crochet Pattern
Introduction
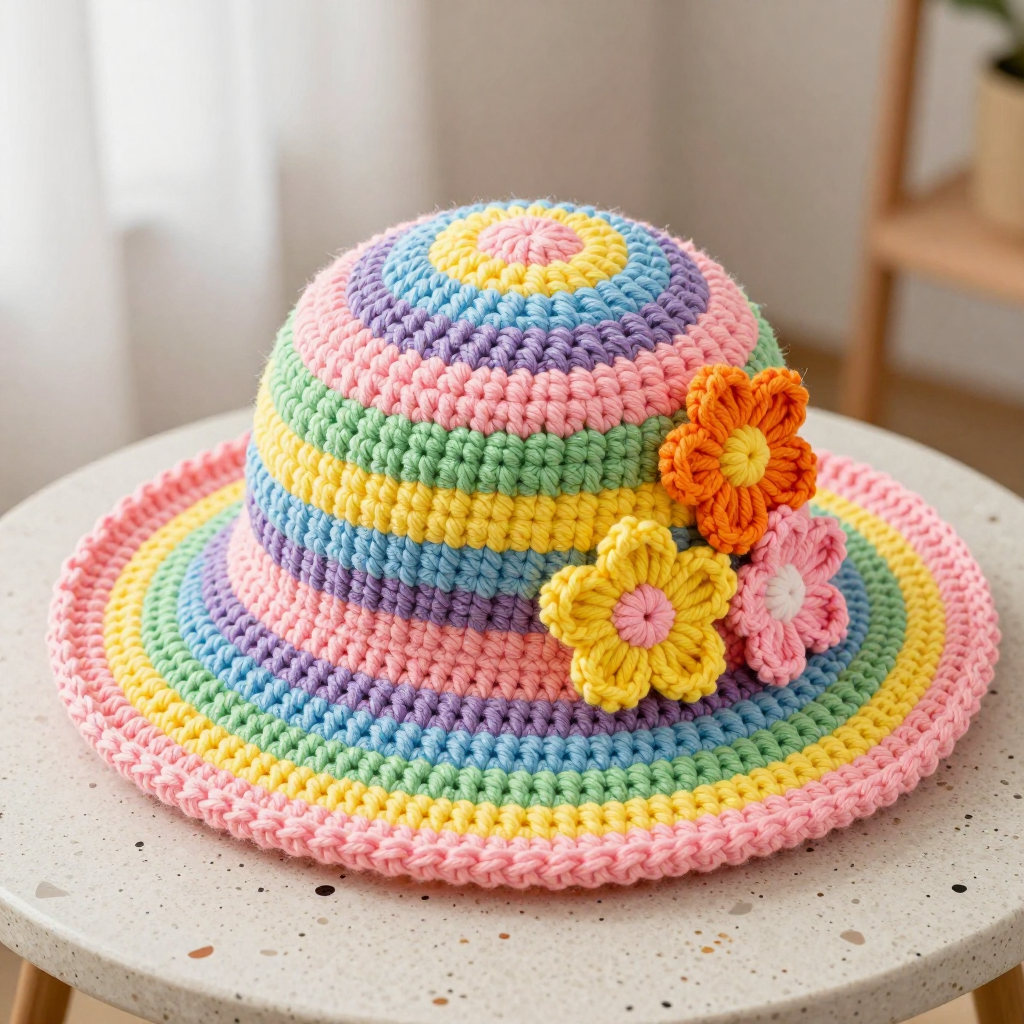
This Pastel Peony Wide-Brim Hat is a cheerful, spring-ready project for anyone who has crocheted a few rounds and wants to make something wearable. The crown is worked in simple double crochet with soft candy stripes of pastel pink, yellow, green, blue, and purple, changing every two rounds, so the hat looks and feels light, smooth, and comfortable. The medium floppy brim gives it a sunny, garden-party feel, and a cluster of three tiny bright flowers stitched to the band adds a fresh peek of rainbow color. It is a lovely gift, a summer accessory, or a confidence-building step up for an intermediate beginner.
Materials Needed
- Yarn: (4) Medium weight (worsted) yarn, 100% acrylic. Pastel pink (A) 150 yd, pastel yellow (B) 100 yd, pastel green (C) 100 yd, pastel blue (D) 100 yd, pastel purple (E) 100 yd, bright yellow (F) 10 yd, bright orange (G) 10 yd, bright pink (H) 10 yd.
- Hooks: 5.0 mm (H-8) for the hat crown and flowers, and 6.0 mm (J-10) for the brim.
- Notions: Stitch marker, tapestry needle, scissors, and a measuring tape.
- Finished size: Circumference 22 inches (56 cm), height 7 inches (18 cm) including brim, brim width 3 inches (7.5 cm).
Abbreviations
- ch – chain
- dc – double crochet
- sc – single crochet
- sl st – slip stitch
- st(s) – stitch(es)
- rnd(s) – round(s)
- MR – magic ring (an adjustable loop you crochet into)
- inc – increase (work 2 stitches into the same stitch)
- [ ] – repeat the instructions inside the brackets as directed
Gauge
16 sts and 16 rnds = 4 inches (10 cm) in double crochet with the 5.0 mm hook. To check it, crochet a small flat swatch in dc, measure a 4-inch section, and adjust your hook size if you have more or fewer stitches than 16.
Tips Before You Start
- Change color on the last pull-through of the final stitch of a round so the join looks clean and the stripes stay crisp.
- Keep your tension even on the straight rounds (9–20); this is what makes the sides a smooth cylinder rather than a wavy tube.
- Use a stitch marker in the first stitch of each round so you never lose your place in the long 96-stitch rounds.
- Switch to the 6.0 mm hook exactly at Round 21; the larger hook is what gives the brim its soft flare.
Step-by-Step Instructions
Hat (5.0 mm hook; change color every 2 rounds in the sequence A, B, C, D, E)
Rnd 1: With A, MR, 12 dc, join (12 sts).
Rnd 2: Ch 2, 2 dc in each st around, join (24 sts).
Rnd 3: Ch 2, [dc, 2 dc in next] around, join (36 sts).
Rnd 4: Ch 2, [dc in next 2, 2 dc in next] around, join (48 sts).
Rnd 5: Ch 2, [dc in next 3, 2 dc in next] around, join (60 sts).
Rnd 6: Ch 2, [dc in next 4, 2 dc in next] around, join (72 sts).
Rnd 7: Ch 2, [dc in next 5, 2 dc in next] around, join (84 sts).
Rnd 8: Ch 2, [dc in next 6, 2 dc in next] around, join (96 sts).
Rnds 9–20: Ch 2, dc in each st around, join. Continue changing color every 2 rounds as established (96 sts).
Brim (switch to 6.0 mm hook; continue the color sequence)
Rnd 21: Ch 2, [dc in next 7, 2 dc in next] around, join (108 sts).
Rnd 22: Ch 2, [dc in next 8, 2 dc in next] around, join (120 sts).
Rnd 23: Ch 2, [dc in next 9, 2 dc in next] around, join (132 sts).
Rnd 24: Ch 2, [dc in next 10, 2 dc in next] around, join (144 sts).
Rnd 25: Ch 2, [dc in next 11, 2 dc in next] around, join (156 sts).
Rnd 26: Ch 2, dc in each st around, join (156 sts).
Rnd 27: Ch 1, sc in each st around, join (156 sts). Fasten off and weave in ends.
Flowers (make 3: one each in F, G, and H, with the 5.0 mm hook)
Center: MR, 6 sc, join (6 sts).
Petals: Ch 2, [3 dc in next st, ch 2, sl st in same st] 5 times. Fasten off, leaving a 6-inch tail for sewing.
Assembly and Finishing
Arrange the three flowers in a slightly overlapping cluster on the right side of the hat band. Using the yarn tails and a tapestry needle, sew each flower securely through its center, catching the hat fabric without pulling it tight. Weave in all remaining ends on the wrong side of the hat. Block the hat lightly by misting it with water and shaping the crown and brim over a bowl or hat form; let it dry completely so the brim keeps its soft flare.
Pro Tips and Variations
- For a wider, floppier brim, add one more increase round (dc in next 12, 2 dc in next) before Round 26, then work the final sc round.
- Swap the pastel sequence for two colors only, alternating every 2 rounds, for a bolder striped look.
- Make the flowers in the same pastel shades as the hat for a subtle tone-on-tone finish, or add a small bead to each center for extra sparkle.