Boardwalk Pompom Beanie Free Crochet Pattern
Introduction
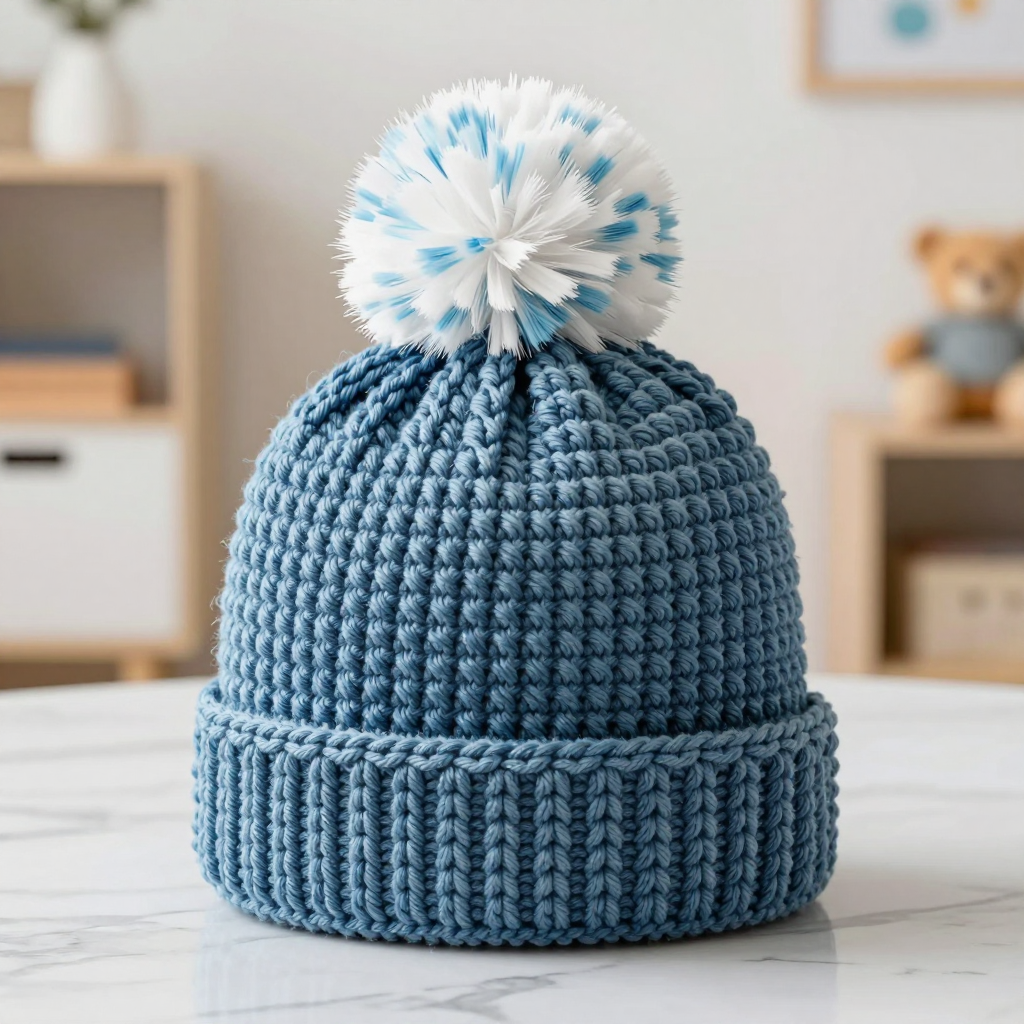
The Boardwalk Pompom Beanie is a relaxed, coastal-inspired hat that's perfect for anyone who loves a cozy beanie with a little extra personality. Worked in faded denim blue with a fluffy white pompom on top, it has that easy seaside feel you can wear from the boardwalk to the coffee shop. The folded double brim keeps your ears warm, while the simple tube construction makes it a wonderful project for advanced beginners ready to stretch their skills. It's soft, stretchy, and quick to work up — you might just want to make one in every color.
Materials Needed
- Yarn A: Worsted weight (4) acrylic or cotton blend, about 200 yds in faded denim blue
- Yarn B: A small amount of fluffy novelty yarn in white or light blue for the pompom
- Hook 1: 5.5 mm (I-9) crochet hook (for the brim)
- Hook 2: 6.5 mm (K-10.5) crochet hook (for the body)
- Notions: Tapestry needle, scissors, stitch marker, pompom maker (optional)
- Finished size: Adult — 20 inches circumference unstretched (fits 21–23 inch head), 9 inches tall including the folded brim
Abbreviations
- ch — chain: make a loop of yarn and pull it through the loop on your hook
- hdc — half double crochet: yarn over, insert hook in stitch, yarn over, pull up a loop, yarn over, pull through all three loops
- sl st — slip stitch: insert hook in stitch, yarn over, pull through both the stitch and the loop on your hook
- st(s) — stitch(es)
- rnd — round: one complete circle of stitches
- RS / WS — right side / wrong side: the outside / inside of your work
- rep — repeat
Gauge
14 stitches x 16 rows = 4 inches in half double crochet with the 6.5 mm hook. To check, crochet a small swatch in hdc and measure a 4-inch section — if you have more stitches than 14, go up a hook size; if fewer, go down.
Tips Before You Start
- The brim is worked flat as a long band, then joined into a ring — try it around your head before joining to confirm the fit.
- Keep your hdc tension relaxed and even; a tight body tube will make the hat less stretchy.
- When working the first round of the body into the brim edge, space your 60 stitches evenly so the tube doesn't pucker.
- Don't skip turning the brim right side out after joining — it makes a big difference to the finished look.
Step-by-Step Instructions
Brim (Yarn A, 5.5 mm hook)
Row 1: Ch 9, hdc in 3rd ch from hook and in each ch across (7 sts).
Row 2: Ch 2, turn, hdc in each st across (7 sts).
Rows 3–58: Rep Row 2 until the piece measures 20 inches, ending on the WS (7 sts). Do not fasten off.
Join: Bring the short ends together and join with sl st across to form a ring, then turn the ring RS out.
Body (Yarn A, 6.5 mm hook)
Rnd 1: Ch 1, work 60 hdc evenly around the brim edge, join with sl st to first hdc (60 sts).
Rnd 2: Ch 2, hdc in each st around, join with sl st (60 sts).
Rnds 3–20: Rep Rnd 2 (60 sts). Fasten off, leaving a 12-inch tail.
Crown Shaping
Turn the hat inside out. Thread the 12-inch tail onto a tapestry needle and weave it through the stitches of the final round. Pull tight to close the top, then secure the yarn on the inside.
Pompom (Yarn B)
Using the 6.5 mm hook and Yarn B (or a pompom maker), make a 3-inch pompom. Attach it securely to the top center of the hat with the tapestry needle, knotting firmly on the inside.
Assembly and Finishing
Fold the brim up about 2 inches over the lower body of the hat. Weave in all remaining ends on the inside of the work, taking care not to pull them too tight. Lightly steam or wet-block the hat to even out the stitches and settle the brim fold, then let it dry fully before wearing.
Pro Tips and Variations
- Swap the pompom for a faux-fur one or leave it off entirely for a cleaner, everyday beanie.
- Work the body in a contrasting stripe pattern every few rounds for a playful beachy look.
- Add a small faux-leather tag to the brim edge for a handmade, boutique-style finish.