Lavender Eyelet Ribbon Crochet Headband Free Pattern
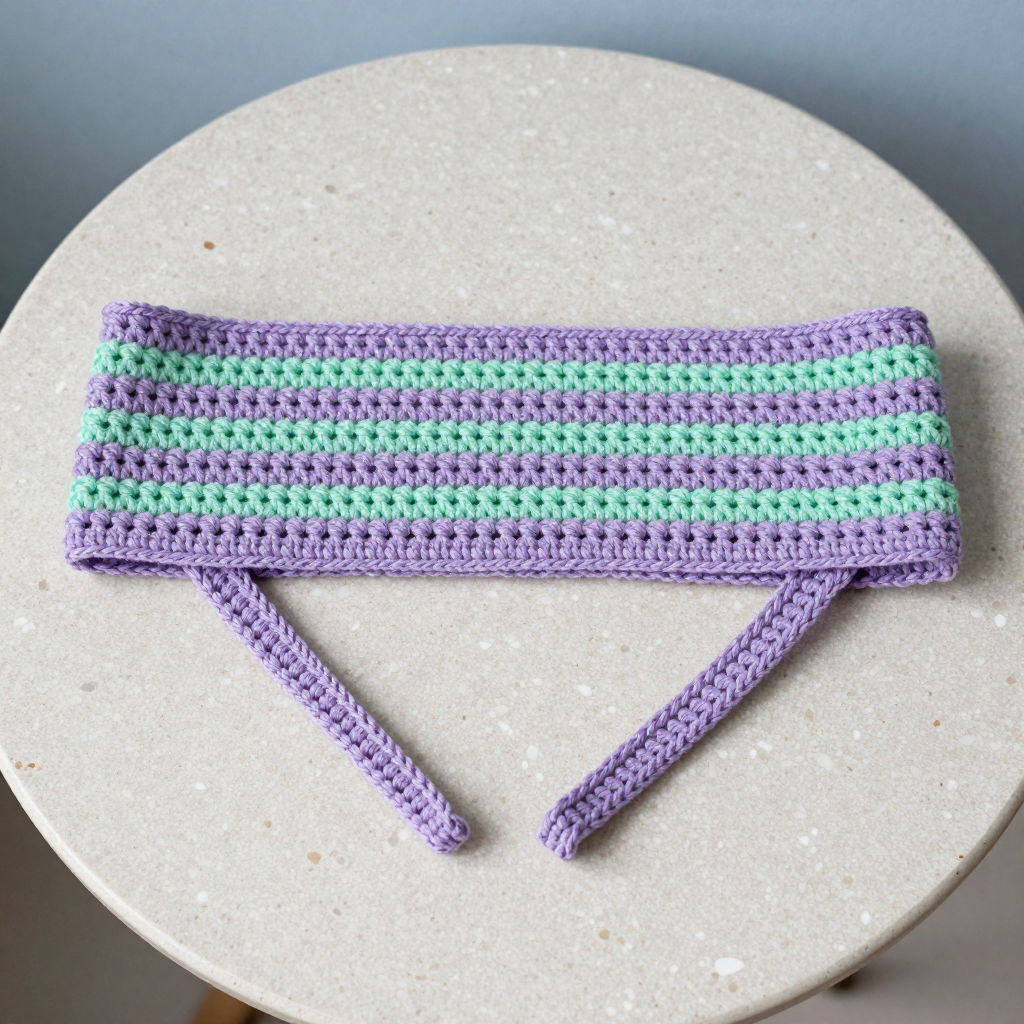
Lavender Eyelet Ribbon Crochet Headband Free Pattern
Introduction
This lavender eyelet ribbon headband is a sweet little project for anyone who loves a soft 1970s boho look. It is beginner-friendly, because the whole band is just a flat rectangle of single crochet with a few simple eyelet rows worked in mint. The finished headband is narrow and light, about 2 inches wide, and the two short ties at the seam give it that vintage ribbon feel. It looks delicate but works up quickly, so it is a lovely gift or a fast weekend make.
Materials Needed
- Yarn: Worsted weight (4) acrylic or cotton. Color A (lavender): about 50 yards. Color B (mint): about 20 yards.
- Hook: 5.0 mm (H/8).
- Notions: Tapestry needle for seaming and weaving in ends, scissors, and a tape measure.
- Finished size: Headband 2 inches wide x 18 inches long (fits a 20-22 inch head). Ties: about 6 inches each.
Abbreviations
- ch – chain: make a loop of yarn and pull it through the loop on your hook.
- sc – single crochet: insert hook in stitch, yarn over, pull up a loop, yarn over, pull through both loops.
- sk – skip: leave the next stitch unworked.
- sp – space: the small gap made by a chain.
- st(s) – stitch(es).
- rep – repeat.
- WS – wrong side (the back of the fabric).
- A / B – Color A (lavender) / Color B (mint).
Gauge
16 stitches x 8 rows = 4 inches in pattern. To check, work a small swatch in single crochet and measure a 4-inch section; adjust your hook if you have too many or too few stitches.
Tips Before You Start
- Keep your single crochets loose and even so the eyelet holes stay open and easy to see.
- Change colors on the last stitch of the row before the new color begins, so the color change sits neatly at the edge.
- Count your stitches at the end of every row; each solid row should have 8 stitches.
- Measure the band as you go, since the 18-inch length matters more than the exact row count.
Step-by-Step Instructions
Headband (Color A)
Ch 9.
R1: Sc in 2nd ch from hook, sc across (8 sts).
R2: Ch 1, turn, sc in each st across (8 sts).
R3: Ch 1, turn, sc in first st, *ch 1, sk next st, sc in next st; rep from * to last st, sc in last st (5 sc, 2 ch-1 sps).
R4: Ch 1, turn, sc in each st and ch-1 sp across (8 sts).
R5-6: Ch 1, turn, sc in each st across (8 sts).
Change to Color B.
R7: Ch 1, turn, sc in first st, *ch 1, sk next st, sc in next st; rep from * to last st, sc in last st (5 sc, 2 ch-1 sps).
R8: Ch 1, turn, sc in each st and ch-1 sp across (8 sts).
Change to Color A.
R9-10: Ch 1, turn, sc in each st across (8 sts).
Repeat R3-10 until the piece measures 18 inches, ending with R10. Fasten off.
Ties (make 2, Color A)
Ch 31.
Row 1: Sc in 2nd ch from hook and each ch across (30 sts). Fasten off.
Assembly and Finishing
Fold the headband in half lengthwise with wrong sides together and sew the short ends together to form a loop. Sew one tie to each short end of the headband at the seam. Weave in all ends with the tapestry needle. Block lightly by misting with water and shaping flat, then let it dry completely.
Pro Tips and Variations
- Swap the mint for another contrast color, such as cream or pale pink, for a different vintage palette.
- Make the ties longer or shorter to suit your preferred bow size.
- Use a cotton yarn for a crisper eyelet texture, or acrylic for a softer, stretchier band.


