Cotton Candy Shells Baby Blanket Free Crochet Pattern
Introduction
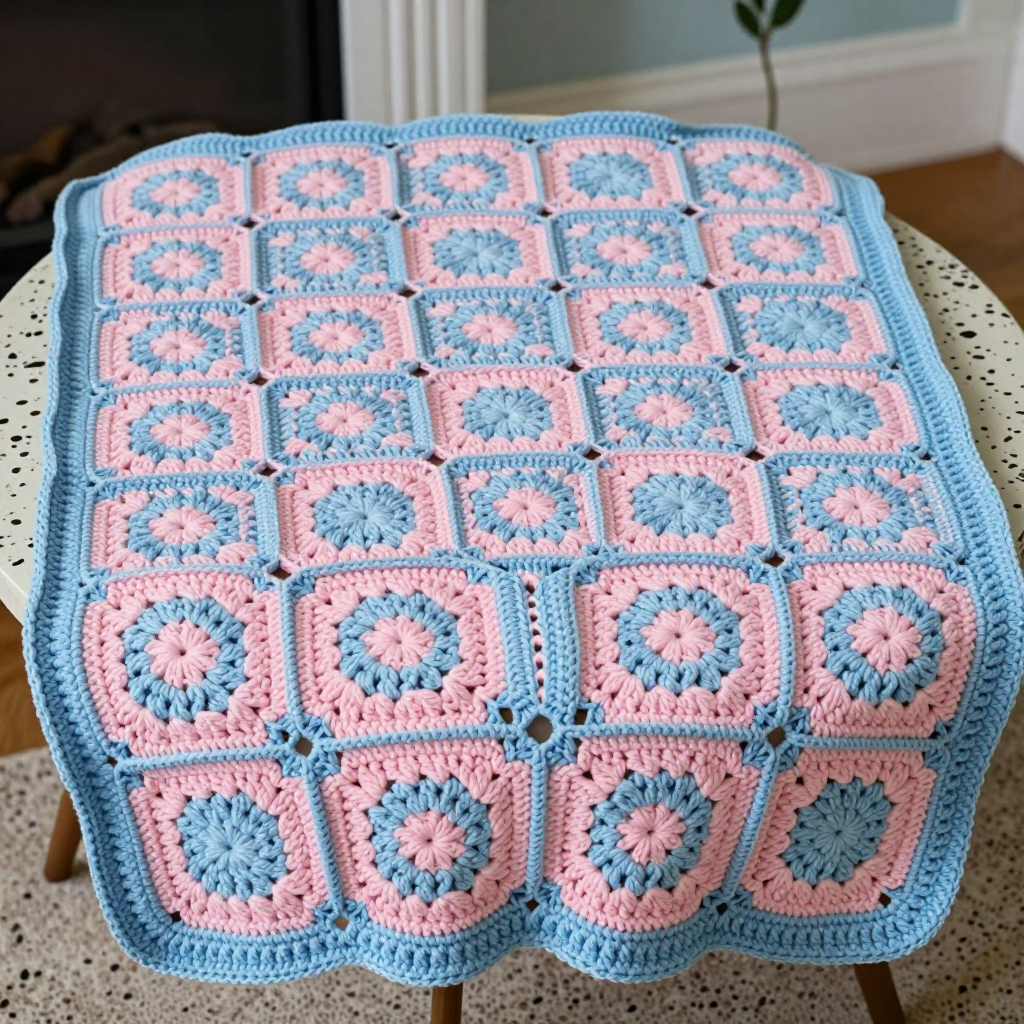
This Cotton Candy Shells Baby Blanket is a sweet, airy little blanket made from 42 shell stitch squares in soft baby blue and cotton candy pink. It is designed for crocheters who know their basic stitches and are ready for a fun, portable project made of small, satisfying pieces. The raised 3-double-crochet shells and open chain spaces give it a light, textured look that feels gentle and breathable, perfect for a Mediterranean summer or a warm-weather baby shower. Worked in DK cotton, it drapes softly and washes easily, so it can be loved and used every day.
Materials Needed
- Yarn: DK weight (3) cotton or cotton blend. Color A (baby blue): 500 yards. Color B (cotton candy pink): 500 yards.
- Hook: 5.0 mm (H-8) crochet hook.
- Notions: Tapestry needle for weaving in ends, stitch markers (optional), scissors, and blocking mats with rust-proof pins.
- Finished size: 36 x 42 inches (6 rows of 7 squares, each square 6 x 6 inches after blocking).
Abbreviations
- ch – chain: yarn over and pull through the loop on your hook.
- sl st – slip stitch: insert hook, yarn over, pull through both the stitch and the loop on your hook.
- dc – double crochet: yarn over, insert hook, yarn over, pull up a loop, yarn over and pull through 2 loops twice.
- sp – space: the gap made by a chain or chains in the previous round.
- rep – repeat: work the instructions again as many times as stated.
- R / Rnd – row / round.
Gauge
One finished square measures 6 x 6 inches after blocking. Make one square first and measure it; if it is larger, go down a hook size, and if it is smaller, go up a hook size.
Tips Before You Start
- Make one practice square and block it before crocheting all 42, so you know your gauge and finished size are right.
- Keep your ch-1 and ch-2 spaces loose and even; tight chains make the shells pucker and the squares hard to join.
- Weave in ends as you finish each square instead of saving them all for the end.
- Sort your finished squares into two piles (blue and pink) and count them often so you end up with exactly 21 of each.
Step-by-Step Instructions
Shell Square (make 21 with A, 21 with B)
Setup: With A or B, ch 4, join with sl st to form a ring.
R1: Ch 3 (counts as dc), 2 dc in ring, [ch 2, 3 dc in ring] 3 times, ch 2, join with sl st to top of ch-3 (12 dc, 4 ch-2 sps).
R2: Sl st to first ch-2 sp, ch 3, 2 dc in same sp, ch 2, 3 dc in same sp (corner), *ch 1, (3 dc, ch 2, 3 dc) in next ch-2 sp; rep from * around, ch 1, join with sl st to top of ch-3 (24 dc, 4 ch-1 sps, 4 ch-2 sps).
R3: Sl st to first ch-2 sp, ch 3, 2 dc in same sp, ch 2, 3 dc in same sp (corner), *ch 1, 3 dc in next ch-1 sp, ch 1, (3 dc, ch 2, 3 dc) in next ch-2 sp; rep from * around, ch 1, join with sl st to top of ch-3 (36 dc, 8 ch-1 sps, 4 ch-2 sps).
R4: Sl st to first ch-2 sp, ch 3, 2 dc in same sp, ch 2, 3 dc in same sp (corner), *[ch 1, 3 dc in next ch-1 sp] twice, ch 1, (3 dc, ch 2, 3 dc) in next ch-2 sp; rep from * around, ch 1, join with sl st to top of ch-3 (48 dc, 12 ch-1 sps, 4 ch-2 sps).
Finish: Fasten off. Repeat until you have 21 squares in A and 21 squares in B.
Assembly
Arrange the squares in 6 rows of 7 squares, alternating colors in a checkerboard pattern so no two same-colored squares share an edge.
Join squares with sl st through back loops only, working in rows first and then in columns, or use the join-as-you-go method if you prefer.
Edging
With right side facing, join A in any corner ch-2 sp.
Rnd 1: Ch 3, 2 dc in same sp, *[ch 1, 3 dc in next ch-1 sp] across to next corner ch-2 sp, ch 1, (3 dc, ch 2, 3 dc) in corner ch-2 sp; rep from * around, ch 1, join with sl st to top of ch-3 (a multiple of 3 dc with 2 ch between corners).
Rnd 2: Sl st to first ch-2 sp, ch 3, 2 dc in same sp, *[ch 1, 3 dc in next ch-1 sp] across to next corner ch-2 sp, ch 1, (3 dc, ch 2, 3 dc) in corner ch-2 sp; rep from * around, ch 1, join with sl st to top of ch-3.
Finish: Fasten off.
Assembly and Finishing
Seam the squares as described in the Assembly section, keeping your slip stitches relaxed so the seams stay soft and stretchy. Weave in all remaining ends on the wrong side with your tapestry needle, working in a few directions so they stay secure. Block the finished blanket to 36 x 42 inches: mist it lightly, pin it out evenly on blocking mats, and let it dry completely before removing the pins. Blocking opens up the shells and evens out the squares.
Pro Tips and Variations
- Make a smaller lovey or stroller blanket by using just 12 squares (3 x 4) and working the same two edging rounds.
- Try a soft cream or mint as Color A for a calmer, more neutral palette.
- Use a contrasting color for the edging, or add a third round of shells in Color B for a bolder border.