Blush Stripe Capybara Cocoon Set Free Crochet Pattern
Blush Stripe Capybara Cocoon Set Free Crochet Pattern
Introduction
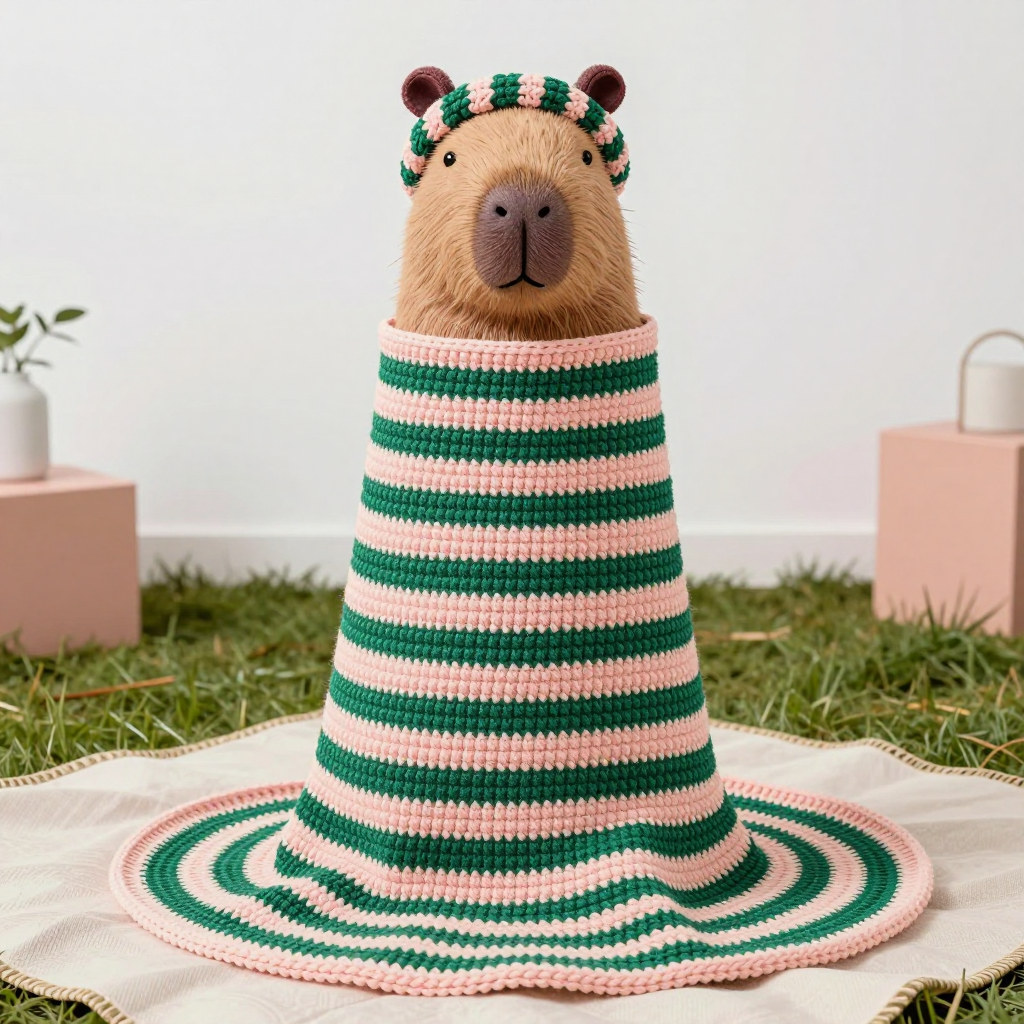
This sweet cocoon set is made for toddlers and their photographers — a cozy, plush photo prop that turns a wiggly little one into a sleepy capybara. The cocoon is worked in a soft chevron texture with bold emerald and blush stripes, topped with a round, stuffed capybara head complete with tiny ears, eyes, and nose. Because it's worked in super bulky chenille yarn, it stitches up quickly and feels cloud-soft against the skin. A matching chevron headband finishes the look, so the whole set is ready for a photo session in a weekend.
Materials Needed
- Yarn: Super bulky (6) chenille plush yarn — 200 yds emerald (A), 150 yds blush (B), 50 yds white (C) for eyes and nose.
- Hook: 8.0 mm (L-11) crochet hook.
- Notions: Stitch marker, tapestry needle, scissors, polyester fiberfill for stuffing the head.
- Finished size: Cocoon 18" circumference x 20" height; Head 6" diameter; Headband 16" circumference x 2" wide.
Abbreviations
- ch — chain: make a loop of yarn and pull it through the loop on your hook.
- sc — single crochet: insert hook, yarn over, pull up a loop, yarn over, pull through both loops.
- inc — increase: work 2 single crochet stitches into the same stitch.
- dec — decrease: work 2 stitches together into 1 (insert hook in next stitch, pull up a loop, insert hook in following stitch, pull up a loop, yarn over, pull through all 3 loops).
- MR — magic ring: an adjustable loop you crochet into to start a circle.
- rep — repeat: work the bracketed instructions again as many times as stated.
- sts — stitches.
Gauge
8 sts and 4 rows = 4 inches in the chevron pattern. Work a small swatch in pattern, lay it flat without stretching, and measure across the middle to check your stitch count and row height before starting.
Tips Before You Start
- Chenille yarn sheds and is hard to unravel, so count your stitches at the end of every round — the chevron repeat must stay at 72 sts on the cocoon and 64 sts on the headband.
- Use a stitch marker in the first stitch of each joined round so you never lose your place when the stripes change.
- Change colors on the last pull-through of the final stitch of a round for a clean, even stripe line.
- Stuff the head firmly but not rock-hard, adding fiberfill in small handfuls as you decrease so it stays round.
Step-by-Step Instructions
Cocoon (A)
Rnd 1: Ch 72, join with a slip stitch to the first ch, sc in each ch around (72 sts).
Rnd 2: [sc in next 3, 3 sc in next, sc in next 3, skip 2] rep around (72 sts).
Rnds 3-4: Rep Rnd 2 (72 sts). Change to B.
Rnds 5-6: Rep Rnd 2 (72 sts). Change to A.
Rnds 7-8: Rep Rnd 2 (72 sts). Change to B.
Rnds 9-10: Rep Rnd 2 (72 sts). Change to A.
Rnds 11-12: Rep Rnd 2 (72 sts). Change to B.
Rnds 13-14: Rep Rnd 2 (72 sts). Change to A.
Rnds 15-16: Rep Rnd 2 (72 sts). Change to B.
Rnds 17-18: Rep Rnd 2 (72 sts). Change to A.
Rnds 19-20: Rep Rnd 2 (72 sts). Change to B.
Rnds 21-22: Rep Rnd 2 (72 sts). Change to A.
Rnds 23-24: Rep Rnd 2 (72 sts). Change to B.
Rnds 25-26: Rep Rnd 2 (72 sts). Change to A.
Rnds 27-28: Rep Rnd 2 (72 sts). Change to B.
Rnds 29-30: Rep Rnd 2 (72 sts). Change to A.
Rnds 31-32: Rep Rnd 2 (72 sts). Change to B.
Rnds 33-34: Rep Rnd 2 (72 sts). Change to A.
Rnds 35-36: Rep Rnd 2 (72 sts). Fasten off A.
Edging: Join B at the top opening, sc evenly around (72 sts). Fasten off.
Head (B)
Rnd 1: MR, 6 sc into the ring (6 sts).
Rnd 2: inc x6 (12 sts).
Rnd 3: [sc, inc] x6 (18 sts).
Rnd 4: [2 sc, inc] x6 (24 sts).
Rnd 5: [3 sc, inc] x6 (30 sts).
Rnd 6: [4 sc, inc] x6 (36 sts).
Rnds 7-12: sc in each st around (36 sts).
Rnd 13: [4 sc, dec] x6 (30 sts).
Rnd 14: [3 sc, dec] x6 (24 sts).
Rnd 15: [2 sc, dec] x6 (18 sts). Stuff firmly.
Rnd 16: [sc, dec] x6 (12 sts).
Rnd 17: dec x6 (6 sts). Fasten off, leaving a tail to close the opening.
Ears (make 2, B)
Rnd 1: MR, 4 sc into the ring (4 sts).
Rnd 2: inc x4 (8 sts).
Rnd 3: sc in each st around (8 sts).
Rnd 4: dec x4 (4 sts). Fasten off, leaving a long tail for sewing.
Eyes (make 2, C)
Rnd 1: MR, 4 sc into the ring (4 sts). Fasten off, leaving a tail.
Nose (C)
Row 1: Ch 2, sc in the 2nd ch from hook (1 st). Fasten off, leaving a tail.
Headband (A)
Rnd 1: Ch 64, join with a slip stitch to the first ch, sc in each ch around (64 sts).
Rnd 2: [sc in next 3, 3 sc in next, sc in next 3, skip 2] rep around (64 sts).
Rnd 3: Rep Rnd 2 (64 sts). Change to B.
Rnd 4: Rep Rnd 2 (64 sts). Fasten off.
Assembly and Finishing
Sew the ears to the head at Round 6, one on each side, using the long tails. Sew the eyes at Round 8, spacing them evenly across the front, and sew the nose at Round 10 between and slightly below the eyes. Sew the finished head to the top of the cocoon, centering it on the edging. Weave in all ends on the wrong side, tucking them into the fabric so they don't show through the chenille. Lightly steam-block the cocoon and headband to settle the chevron points — do not press the chenille with a hot iron. Fluff the head into a round shape with your fingers.
Pro Tips and Variations
- Swap the emerald and blush for any two contrasting super bulky colors to match a nursery theme.
- Add a small blush pom-pom to the back of the headband for a playful finishing touch.
- For a smaller newborn prop, work the cocoon with 60 sts instead of 72 and shorten to 28 rounds.