Blush Emerald Striped Towel Topper Free Crochet Pattern
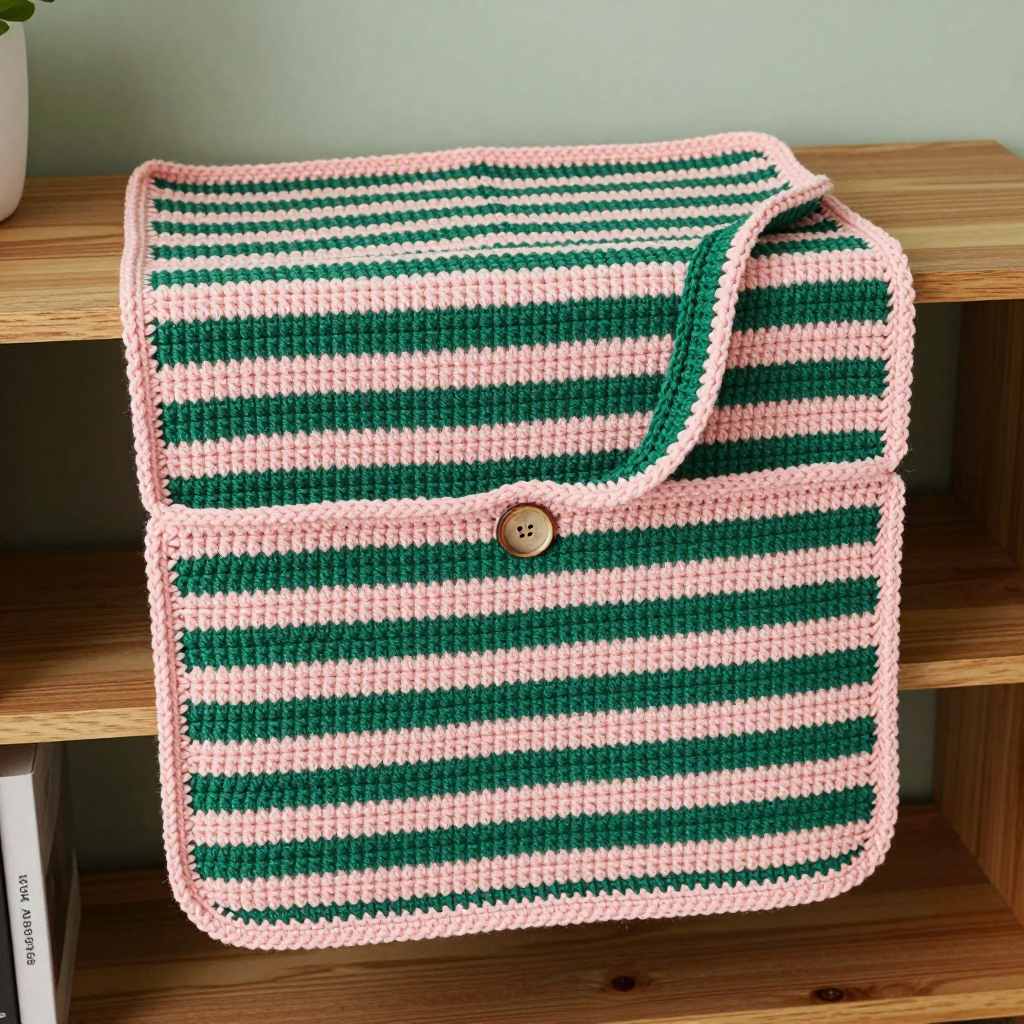
Blush Emerald Striped Towel Topper Free Crochet Pattern
Introduction
This Blush Emerald Striped Towel Topper is a cheerful little kitchen accessory that anyone can make, even if you have only just learned single crochet. It is two simple striped rectangles joined into a folded pocket that slips over your towel bar, so your hand towel stays put instead of landing on the floor. The bold emerald and blush bands give it a fresh, modern look, while the smooth cotton fabric feels sturdy, absorbent, and easy to wash. A single large button and a crocheted loop finish it off with a neat, handmade touch.
Materials Needed
- Yarn: (4) Medium worsted weight yarn, 100% cotton. Emerald (A): 80 yds; Blush (B): 80 yds.
- Hook: 4.0 mm (G-6) crochet hook.
- Notions: Tapestry needle, scissors, one large button (about 1 inch), stitch markers (optional).
- Finished size: 7 inches wide x 14 inches long (folded).
Abbreviations
- ch – chain: yarn over and pull through the loop on your hook.
- sc – single crochet: insert hook in stitch, yarn over, pull up a loop, yarn over, pull through both loops.
- sl st – slip stitch: insert hook in stitch, yarn over, pull through both the stitch and the loop on your hook.
- st(s) – stitch(es).
- RS / WS – right side / wrong side (the outside and inside of the fabric).
Gauge
16 sts and 16 rows = 4 inches in single crochet. To check, crochet a small swatch in single crochet and measure a 4-inch section; adjust your hook size if your stitches are too tight or too loose.
Tips Before You Start
- Change colors on the last stitch of the row: work the final sc of the old color until two loops remain, then pull the new color through to finish the stitch. This keeps the stripe edge clean.
- Keep your turning chain tight (ch 1, then sc in the first st) so the side edges stay straight and easy to seam.
- Make both panels before seaming and lay them side by side to check that the stripes line up.
- Cotton has little stretch, so resist pulling your stitches tight; a relaxed, even tension gives a softer towel topper.
Step-by-Step Instructions
Panel (make 2)
With A, ch 29.
Row 1: sc in 2nd ch from hook and each ch across (28 sts).
Rows 2-6: sc in each st across (28 sts). Change to B.
Rows 7-12: sc in each st across (28 sts). Change to A.
Rows 13-18: sc in each st across (28 sts). Change to B.
Rows 19-24: sc in each st across (28 sts). Change to A.
Rows 25-30: sc in each st across (28 sts). Change to B.
Rows 31-36: sc in each st across (28 sts). Change to A.
Rows 37-42: sc in each st across (28 sts). Change to B.
Rows 43-48: sc in each st across (28 sts). Change to A.
Rows 49-54: sc in each st across (28 sts). Change to B.
Rows 55-56: sc in each st across (28 sts). Fasten off.
Button Loop
With A, join yarn at the top right corner of one panel.
Loop: ch 10, sl st in the same corner to form a loop. Fasten off.
Assembly
Hold the two panels with WS together.
Joining: Starting at the bottom left corner, sc through both layers evenly up the left side, across the top (leaving the button loop free), and down the right side. Fasten off. The bottom edge stays open to form the pocket.
Edging
Join B at the bottom right corner.
Edging round: sc evenly around the entire outer edge, working 3 sc in each corner. Fasten off.
Button
Sew the button to the center of the front panel, 1 inch below the top edge, aligning it with the loop.
Assembly and Finishing
Weave in all ends on the wrong side, running each tail through a few stitches before trimming. Gently block the finished topper by misting it with water and pinning it to the finished measurements (7 inches wide x 14 inches long folded), then let it dry completely. Check that the button loop sits comfortably over the button and adjust the button position by a stitch or two if needed.
Pro Tips and Variations
- Swap the stripe colors for any two shades you love, or use up partial skeins for a scrappy version.
- Work the edging in a contrasting third color for an extra pop around the border.
- Add a hanging loop of ch 12 at the top center so the topper can hang on a hook when not in use.