Striped Victorian Phone Pouch Knit Free Pattern
Introduction
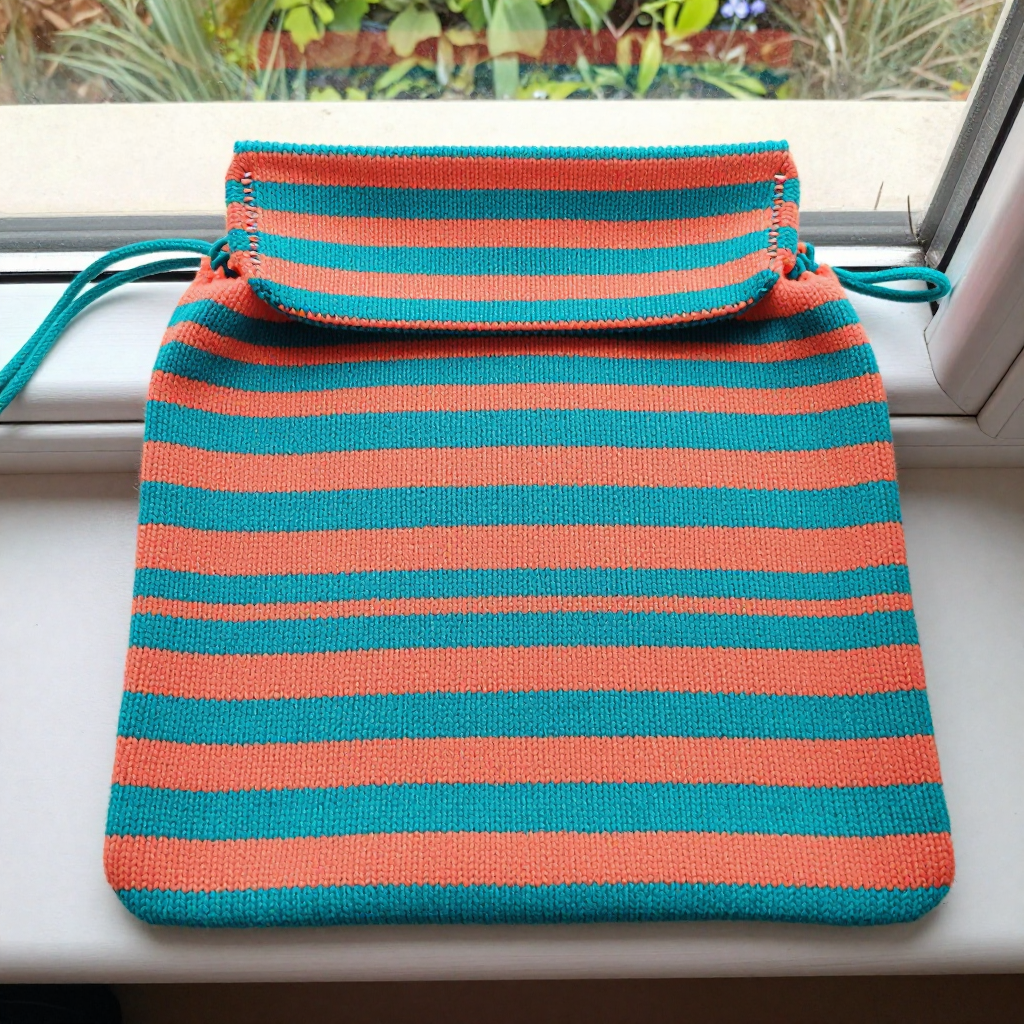
This striped Victorian phone pouch is a sweet little project for anyone who has mastered knit and purl and is ready to try simple intarsia color changes. Two identical stockinette rectangles are knitted in alternating teal and coral stripes, then seamed into a slim pouch with a fold-over flap and a knitted cord tie. The worsted cotton gives it a smooth, crisp fabric with a lovely drape, and the 6-row stripes create a neat, vintage-inspired look that feels both classic and playful. It is sized to fit most smartphones, making it a practical and pretty accessory you can finish in a weekend.
Materials Needed
- Yarn: Worsted weight cotton (100% cotton, 100 g / 180 yds per skein): 1 skein each in Teal (A) and Coral (B). Approx. 90 yds A, 70 yds B.
- Needles: 4.0 mm (US 6) straight needles.
- Notions: Tapestry needle for seaming and weaving in ends, scissors, a spare double-pointed needle or cable needle for the I-cord, and a crochet hook (optional, for threading the cord).
- Finished size: Width 4 inches (10 cm), height 7 inches (18 cm) including flap; fits phones up to 3.5 inches wide and 6.5 inches tall.
Abbreviations
- A: Teal
- B: Coral
- BO: Bind off
- CO: Cast on
- I-cord: A narrow knitted tube worked on a few stitches
- RS: Right side (the smooth knit face)
- St(s): Stitch(es)
- St st: Stockinette stitch (knit on RS rows, purl on WS rows)
- WS: Wrong side (the purl back)
Gauge
20 sts and 26 rows = 4 inches in stockinette stitch. Knit a small swatch in stockinette, block it lightly, and measure a 4-inch section to confirm your stitch and row counts match before starting.
Tips Before You Start
- Wind small bobbins of Teal and Coral before you begin so each stripe color change stays tidy and does not tangle.
- Twist the two colors around each other at every color change on the wrong side to prevent gaps in the fabric.
- Keep your tension even at the color changes; give the new color a gentle tug after the first stitch.
- Block your finished pieces before seaming so the rectangles are flat and the same size.
Step-by-Step Instructions
Back and Front (make 2 identical)
With A, CO 20 sts. Work in stockinette st (RS knit, WS purl) with intarsia color changes as follows:
Rows 1-6: A (20 sts)
Rows 7-12: B (20 sts)
Rows 13-18: A (20 sts)
Rows 19-24: B (20 sts)
Rows 25-30: A (20 sts)
Rows 31-36: B (20 sts)
Rows 37-42: A (20 sts)
Rows 43-48: B (20 sts)
Rows 49-54: A (20 sts)
Rows 55-60: B (20 sts)
Rows 61-66: A (20 sts)
Rows 67-72: B (20 sts)
Rows 73-78: A (20 sts)
Rows 79-84: B (20 sts)
Rows 85-90: A (20 sts)
BO all sts. Make a second piece the same way.
Flap (make 1)
With A, CO 20 sts. Work in stockinette st for 24 rows, changing colors as follows:
Rows 1-12: A (20 sts)
Rows 13-18: B (20 sts)
Rows 19-24: A (20 sts)
BO all sts.
Cord
With A, CO 3 sts. Work I-cord for 12 inches. BO.
Assembly and Finishing
Place the front and back pieces with WS together. Seam the sides using mattress stitch, leaving the top edge open. Fold the flap over the top edge and sew it in place along the top edge only. Thread the cord through the top corners of the pouch and tie. Weave in all ends. Block the finished pouch lightly to smooth the seams and even out the stripes.
Pro Tips and Variations
- Swap the stripe colors for a two-tone palette that matches your phone case or bag.
- Add a small button and loop instead of the cord tie for a quicker closure.
- Use a contrasting color for the flap for a bolder, more modern look.