Retro Sunset Striped Crochet Crossbody Pouch Free Pattern
Introduction
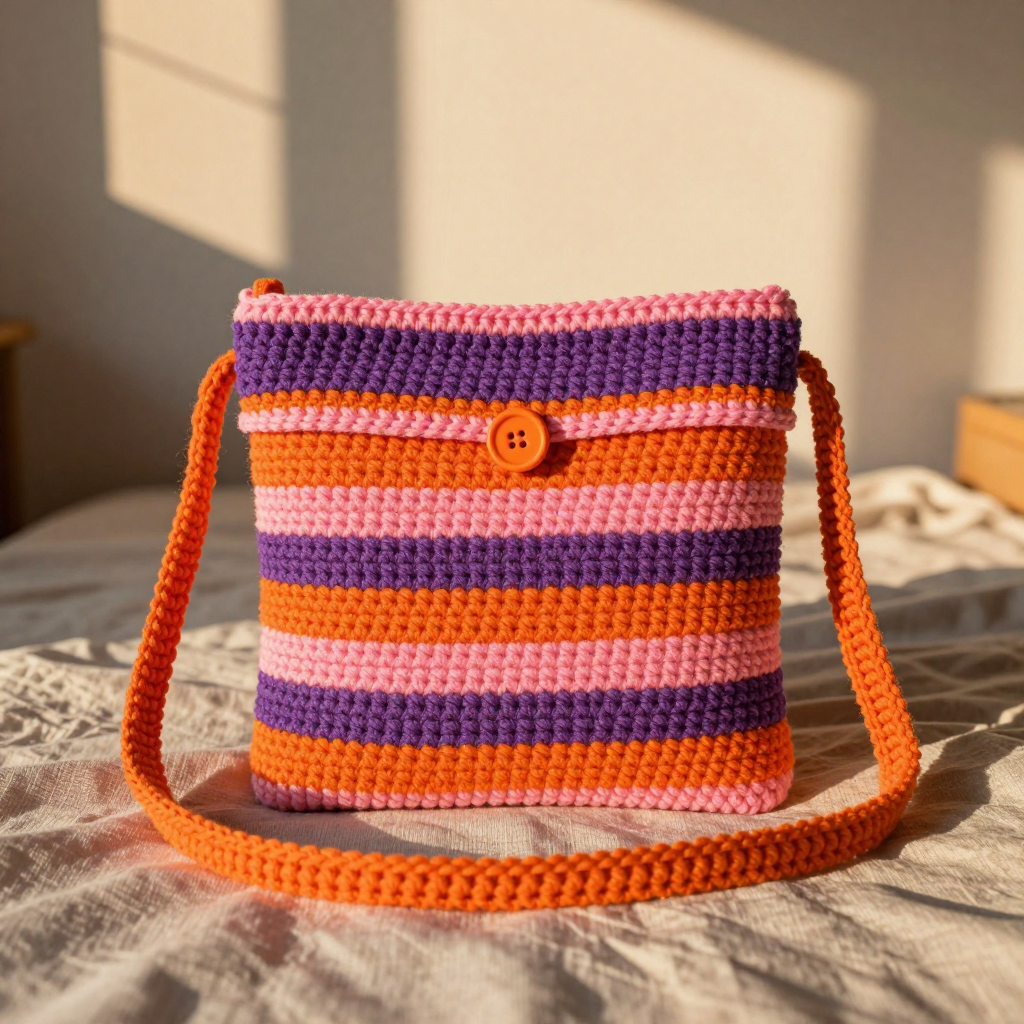
This little messenger-style pouch is the perfect project for anyone who has mastered single crochet and wants to make something they will actually use every day. It is worked from one simple flat rectangle, then folded and seamed at the sides, so there is no shaping to worry about. The bold sunset stripes of orange, pink, and purple give it that unmistakable 90s retro look, and the striped flap with a button loop finishes it off. At about 8 inches wide by 10 inches tall with a 44-inch strap, it sits comfortably across your body and feels sturdy and soft in worsted weight acrylic.
Materials Needed
- Yarn: Worsted weight (4) acrylic yarn: 150 yd orange (A), 100 yd pink (B), 80 yd purple (C)
- Hook: 5 mm (H-8) crochet hook
- Notions: Tapestry needle, scissors, one button (about 3/4 inch), stitch marker (optional)
- Finished size: Approx. 8" wide x 10" tall (20 cm x 25 cm), strap length 44" (112 cm)
Abbreviations
- ch – chain: yarn over and pull through the loop on your hook
- sc – single crochet: insert hook in stitch, yarn over, pull up a loop, yarn over, pull through both loops
- sl st – slip stitch: insert hook in stitch, yarn over, pull through stitch and loop on hook
- st(s) – stitch(es)
- rep – repeat
Gauge
14 sts and 16 rows = 4 inches (10 cm) in single crochet. Work a small swatch and measure a 4-inch section; if you have more stitches than 14, go up a hook size, and if you have fewer, go down a size.
Tips Before You Start
- Change colors on the last yarn over of the final stitch of a row so the new color starts cleanly on the next row.
- Keep your turning chains loose but consistent; tight chains make the side edges pull in.
- Count your 28 stitches at the end of every row — the stripes make it easy to drift without noticing.
- Work the strap a little longer than you think you need; single crochet straps stretch slightly with wear.
Step-by-Step Instructions
Body (worked flat, then folded)
With A, ch 29.
Row 1: sc in 2nd ch from hook and each ch across (28 sc).
Rows 2-6: ch 1, turn, sc in each st across (28 sc). Change to B.
Rows 7-12: ch 1, turn, sc in each st across (28 sc). Change to C.
Rows 13-18: ch 1, turn, sc in each st across (28 sc). Change to A.
Rows 19-24: ch 1, turn, sc in each st across (28 sc). Change to B.
Rows 25-30: ch 1, turn, sc in each st across (28 sc). Change to C.
Rows 31-36: ch 1, turn, sc in each st across (28 sc). Change to A.
Rows 37-42: ch 1, turn, sc in each st across (28 sc). Change to B.
Rows 43-48: ch 1, turn, sc in each st across (28 sc). Change to C.
Rows 49-54: ch 1, turn, sc in each st across (28 sc). Change to A.
Rows 55-60: ch 1, turn, sc in each st across (28 sc). Fasten off.
Folding and Side Seams
Fold the rectangle in half with right sides together, matching the short ends. Seam both sides using sc or whipstitch, leaving the top open. Turn right side out.
Flap
With right side facing, join C at the top right corner of the back panel.
Row 1: ch 1, sc evenly across top edge of back panel (28 sc).
Rows 2-4: ch 1, turn, sc in each st across (28 sc). Change to B.
Rows 5-6: ch 1, turn, sc in each st across (28 sc). Change to A.
Rows 7-9: ch 1, turn, sc in each st across (28 sc). Fasten off.
Button Loop
With A, join at the center of the flap edge, ch 10, sl st to form a loop. Fasten off.
Strap
With A, leave a 6" tail, ch 3.
Row 1: sc in 2nd ch from hook and next ch (2 sc).
Row 2: ch 1, turn, sc in each st across (2 sc).
Rep Row 2 until the strap measures 44" (112 cm). Fasten off, leaving a 6" tail.
Edging (optional)
With right side facing, join B at the top edge of the front panel, sc evenly around the entire top opening. Fasten off.
Assembly and Finishing
Sew one end of the strap to the side seam at the top, then the opposite end to the other side seam, using the 6" tails. Sew the button to the front panel centered, 1" below the top edge, aligning it with the loop. Weave in all ends on the wrong side. Block lightly by misting with water and shaping flat; do not stretch the strap.
Pro Tips and Variations
- Swap the sunset palette for a single color with a contrasting flap for a cleaner, modern look.
- Add a fabric lining by hand-sewing a simple rectangle inside before closing the top for extra durability.
- Make the strap adjustable by crocheting two shorter straps and joining them with a metal ring or slider.


