Retro Sofa Bolster Pet Bed Free Crochet Pattern
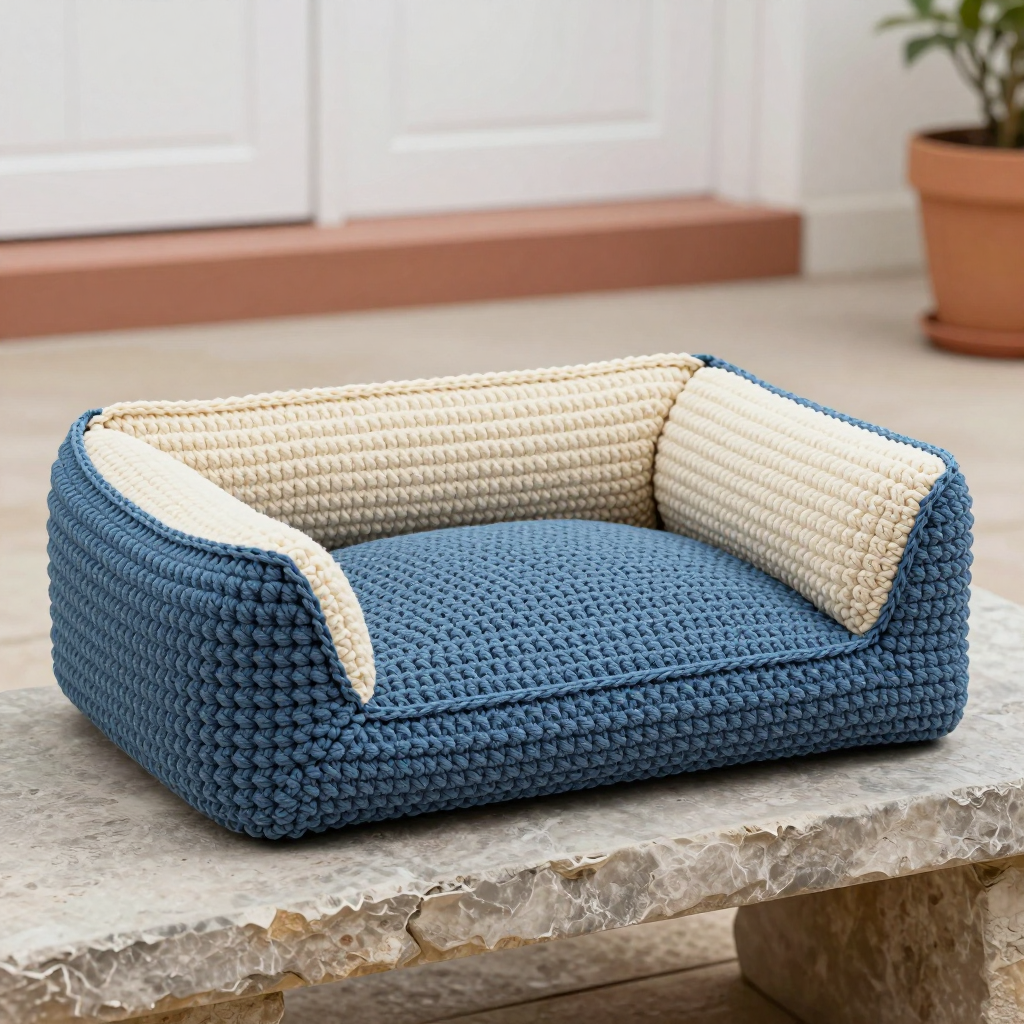
Retro Sofa Bolster Pet Bed Free Crochet Pattern
Introduction
This retro sofa bolster pet bed is a cozy little throwback for the four-legged member of your family. With its denim blue base and sides topped by a plump cream bolster, it looks just like a 90s couch shrunk down to pet size. It is designed for confident beginners, since it is made almost entirely of plain double crochet rectangles and a simple joined border. The flat base gives your pet a stable place to curl up, while the stuffed bolster along the back edge offers a soft headrest to lean against. Worked in smooth worsted weight acrylic, it is sturdy, machine washable, and quick to finish.
Materials Needed
- Yarn: Worsted weight (4) acrylic yarn — 400 yds denim blue (Color A), 200 yds cream (Color B)
- Hook: 6 mm (J/10) crochet hook
- Notions: Tapestry needle, stitch marker, scissors, measuring tape, fiberfill stuffing (about 1 bag)
- Finished size: Approximately 24 inches wide x 18 inches deep x 4 inches high (base); bolster 24 inches long x 6 inches in diameter
Abbreviations
- ch — chain: make a loop of yarn and pull it through the loop on your hook.
- dc — double crochet: yarn over, insert hook in stitch, pull up a loop, yarn over and pull through 2 loops, yarn over and pull through last 2 loops.
- sc — single crochet: insert hook in stitch, pull up a loop, yarn over and pull through both loops.
- sl st — slip stitch: insert hook in stitch, yarn over and pull through both the stitch and the loop on your hook.
- st(s) — stitch(es)
- R — row or round
Gauge
6 dc = 2 inches and 3 rows = 2 inches. Work a small swatch of double crochet and measure it flat; if your stitches are larger or smaller than this, change hook size so the finished bed matches the listed dimensions.
Tips Before You Start
- Keep your tension relaxed and even — a stiff, tight fabric makes the sides stand up but can pucker the base, so aim for a smooth, consistent dc.
- Count your stitches at the end of every row and round; the base must stay at 71 dc and the sides at 192 sts for the bolster and bed to line up.
- When working the side rounds, place a stitch marker in the first stitch of each round so you always know where to join.
- Stuff the bolster firmly but not rock-hard, so it holds its round shape without straining the seams.
Step-by-Step Instructions
Base (Color A)
Row 1: Ch 73, dc in 3rd ch from hook and in each ch across (71 dc).
Rows 2–27: Ch 2, turn, dc in each st across (71 dc). Do not fasten off.
Sides (Color A)
Rnd 1: Ch 1, turn, sc evenly around the entire perimeter of the base, working 1 sc in each dc row end and 1 sc in each dc along the top and bottom edges, join with sl st to first sc (approx 192 sc).
Rnds 2–7: Ch 2, dc in each sc around, join with sl st to first dc (192 dc). Fasten off A.
Bolster (Color B)
Row 1: Ch 31, dc in 3rd ch from hook and in each ch across (29 dc).
Rows 2–36: Ch 2, turn, dc in each st across (29 dc). Fasten off B, leaving a long tail for seaming.
Assembly and Finishing
Fold the bolster in half lengthwise with right sides together and sew the two short ends closed to form a tube. Turn it right side out. Stuff it firmly with fiberfill, then sew the long edges together to close the tube. Sew the finished bolster along one long edge of the base, positioning it on top of the side wall, centered, with the ends extending slightly beyond the base edges. Weave in all ends. Gently steam or lightly mist and shape the base and sides flat, then let the bed dry completely before use.
Pro Tips and Variations
- Swap the cream bolster for a mustard or rust tone for a warmer 70s look, or add a thin stripe of Color A at each end of the bolster.
- Make a removable bolster cover by crocheting the tube slightly larger and adding a simple button or tie closure, so it can be washed separately.
- For a firmer, more structured bed, work the side rounds with a hook one size smaller than the base, or add a round of sc along the top edge of the sides for a neat finished rim.


