Plum Log Cabin Crochet Coatigan Free Pattern
Plum Log Cabin Crochet Coatigan Free Pattern
Introduction
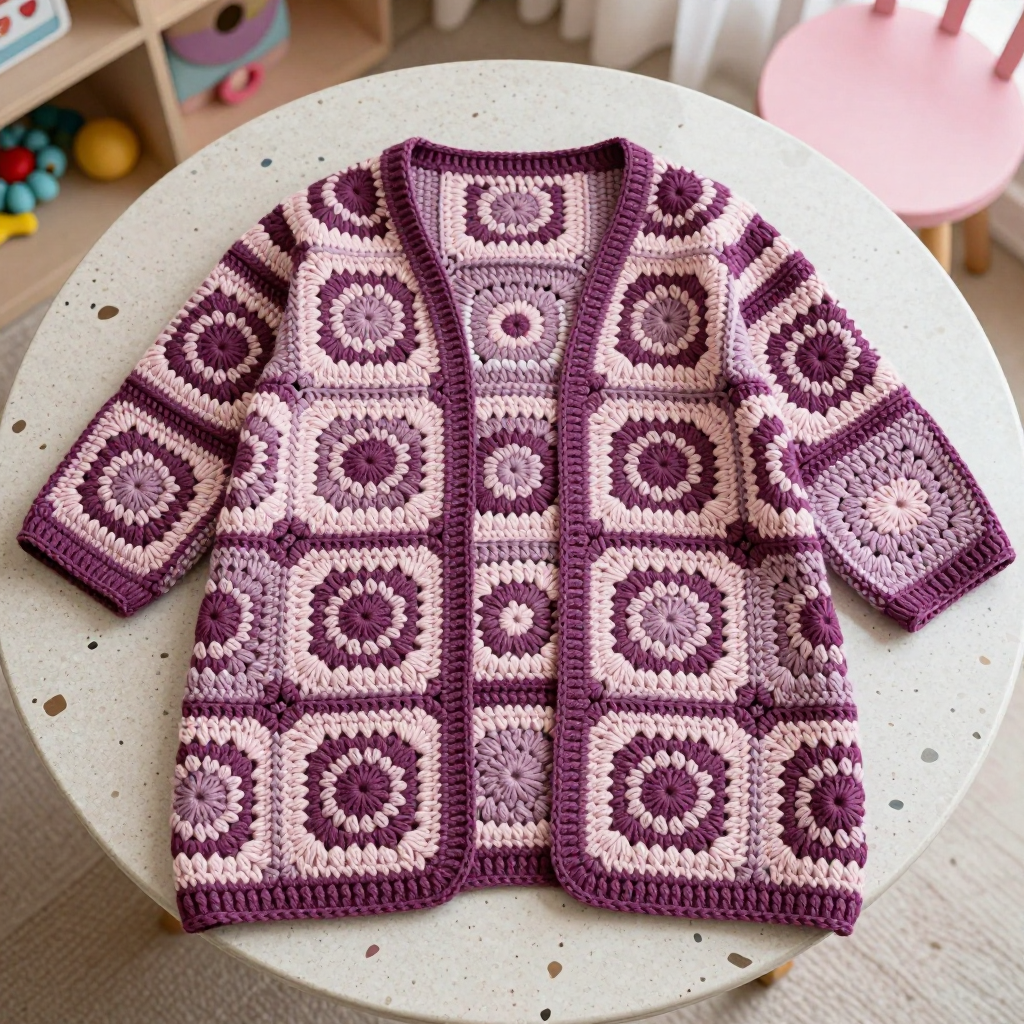
This coatigan is made for anyone who loves the look of a quilted, patchwork coat but wants a project that stays beginner-friendly from start to finish. It is built from 24 identical log cabin squares, each one a simple concentric motif worked in alternating plum and mauve, then joined into a grid with an open front. The result is a soft, drapey, Japandi-inspired layer with a clean geometric look and a cozy, slightly structured feel. Because every square is the same, you get plenty of relaxing practice before assembly, and the finished coatigan looks far more complex than the stitches really are.
Materials Needed
- Yarn: Worsted weight (4) yarn, approximately 1200 (1400, 1600) yards total: 600 (700, 800) yards plum (A) and 600 (700, 800) yards mauve (B). A smooth wool or wool-blend works best for stitch definition and blocking.
- Hook: 6.0 mm (J/10) crochet hook, or the size needed to match gauge.
- Notions: Tapestry needle for seaming and weaving in ends, stitch markers, scissors, and a tape measure.
- Finished size: Bust 48 (52, 56) inches [122 (132, 142) cm]; length 36 (39, 42) inches [91.5 (99, 106.5) cm].
Abbreviations
- ch: chain — make a loop of yarn and pull it through the loop on your hook.
- sl st: slip stitch — insert hook, yarn over, pull through both the stitch and the loop on your hook.
- dc: double crochet — yarn over, insert hook, yarn over and pull up a loop, yarn over and pull through two loops, yarn over and pull through the last two loops.
- sc: single crochet — insert hook, yarn over and pull up a loop, yarn over and pull through both loops.
- sp: space — the ch-2 gap between groups of stitches.
- st(s): stitch(es).
- rep: repeat.
- BL: back loop only — work into the loop of the stitch farthest from you.
Gauge
One log cabin square measures 6 x 6 inches (15 x 15 cm) after blocking. Make one square, block it, and measure it; if it is larger, go down a hook size, and if it is smaller, go up a hook size.
Tips Before You Start
- Make all 24 squares first and block them before seaming so every square is exactly the same size and the grid lies flat.
- Keep your tension even on the 3-dc groups; loose corners make the squares wobbly and harder to join neatly.
- Label your squares by color order as you finish them so the alternating plum and mauve bands stay consistent across the coatigan.
- Try on the joined body before attaching sleeves to confirm the armhole placement feels right for you.
Step-by-Step Instructions
Log Cabin Square (make 24)
Rnd 1: With A, ch 4, join with sl st to form ring. Ch 3 (counts as dc), 2 dc in ring, ch 2, [3 dc in ring, ch 2] 3 times, join with sl st to top of ch-3. Fasten off A. (12 dc, 4 ch-2 sps)
Rnd 2: Join B with sl st in any ch-2 sp, ch 3, 2 dc in same sp, ch 2, 3 dc in same sp (corner), *3 dc in next ch-2 sp, ch 2, 3 dc in same sp; rep from * around, join with sl st to top of ch-3. Fasten off B. (24 dc, 4 ch-2 sps)
Rnd 3: Join A with sl st in any ch-2 sp, ch 3, 2 dc in same sp, ch 2, 3 dc in same sp, *3 dc in next ch-2 sp, ch 2, 3 dc in same sp; rep from * around, join with sl st to top of ch-3. Fasten off A. (36 dc, 4 ch-2 sps)
Rnd 4: Join B with sl st in any ch-2 sp, ch 3, 2 dc in same sp, ch 2, 3 dc in same sp, *3 dc in next ch-2 sp, ch 2, 3 dc in same sp; rep from * around, join with sl st to top of ch-3. Fasten off B. (48 dc, 4 ch-2 sps)
Rnd 5: Join A with sl st in any ch-2 sp, ch 3, 2 dc in same sp, ch 2, 3 dc in same sp, *3 dc in next ch-2 sp, ch 2, 3 dc in same sp; rep from * around, join with sl st to top of ch-3. Fasten off A. (60 dc, 4 ch-2 sps)
Rnd 6: Join B with sl st in any ch-2 sp, ch 3, 2 dc in same sp, ch 2, 3 dc in same sp, *3 dc in next ch-2 sp, ch 2, 3 dc in same sp; rep from * around, join with sl st to top of ch-3. Fasten off B. (72 dc, 4 ch-2 sps)
Rnd 7: Join A with sl st in any ch-2 sp, ch 3, 2 dc in same sp, ch 2, 3 dc in same sp, *3 dc in next ch-2 sp, ch 2, 3 dc in same sp; rep from * around, join with sl st to top of ch-3. Fasten off A. (84 dc, 4 ch-2 sps)
Rnd 8: Join B with sl st in any ch-2 sp, ch 3, 2 dc in same sp, ch 2, 3 dc in same sp, *3 dc in next ch-2 sp, ch 2, 3 dc in same sp; rep from * around, join with sl st to top of ch-3. Fasten off B. (96 dc, 4 ch-2 sps)
Square measures 6 x 6 inches (15 x 15 cm) after blocking.
Body Assembly
Arrange squares in a grid: 4 squares wide (front panels and back) and 6 squares long (total length). For sizes: S/M: 4 squares wide x 6 squares long = 24 squares. L/XL: 4 squares wide x 6.5 squares long (use half squares for length) = 26 squares. 2X/3X: 4 squares wide x 7 squares long = 28 squares.
Sew squares together using whipstitch or sl st, leaving armholes: for S/M, leave 1 square open on each side for armholes at the top of the 4th square from the bottom. For larger sizes, adjust accordingly.
Leave the center front open from bottom to top.
Sleeves (make 2)
Sew squares to form sleeves: 2 squares long x 2 squares wide (4 squares per sleeve). Sew sleeve seams. Attach sleeves to armholes.
Edging
Join A at bottom edge, work sc evenly around entire bottom edge, front opening, and neckline, working 3 sc in each corner. Fasten off.
Ribbed Edging
Join B at bottom edge, work sc in each st around, then work in back loops only for 2 rows. Fasten off.
Sleeve Cuffs
Join A at sleeve edge, work sc evenly around, then work in back loops only for 2 rows. Fasten off.
Assembly and Finishing
Seam all squares with whipstitch or sl st, matching corners and keeping the seams flat so the grid stays even. Sew the sleeve seams, then attach each sleeve to its armhole. Weave in all ends on the wrong side. Block the finished coatigan to the measurements above, pinning the front opening and bottom edge straight, and let it dry completely before wearing.
Pro Tips and Variations
- Swap the plum and mauve placement on some squares to create a subtle checkerboard effect across the grid.
- Add a simple chain-loop or sc loop closure at the top of the front opening if you prefer a closed look.
- Use a contrasting third color for the ribbed edging and cuffs to frame the coatigan like a quilt binding.