Pine Tree Cuff Crochet Wrist Warmers Free Pattern
Introduction
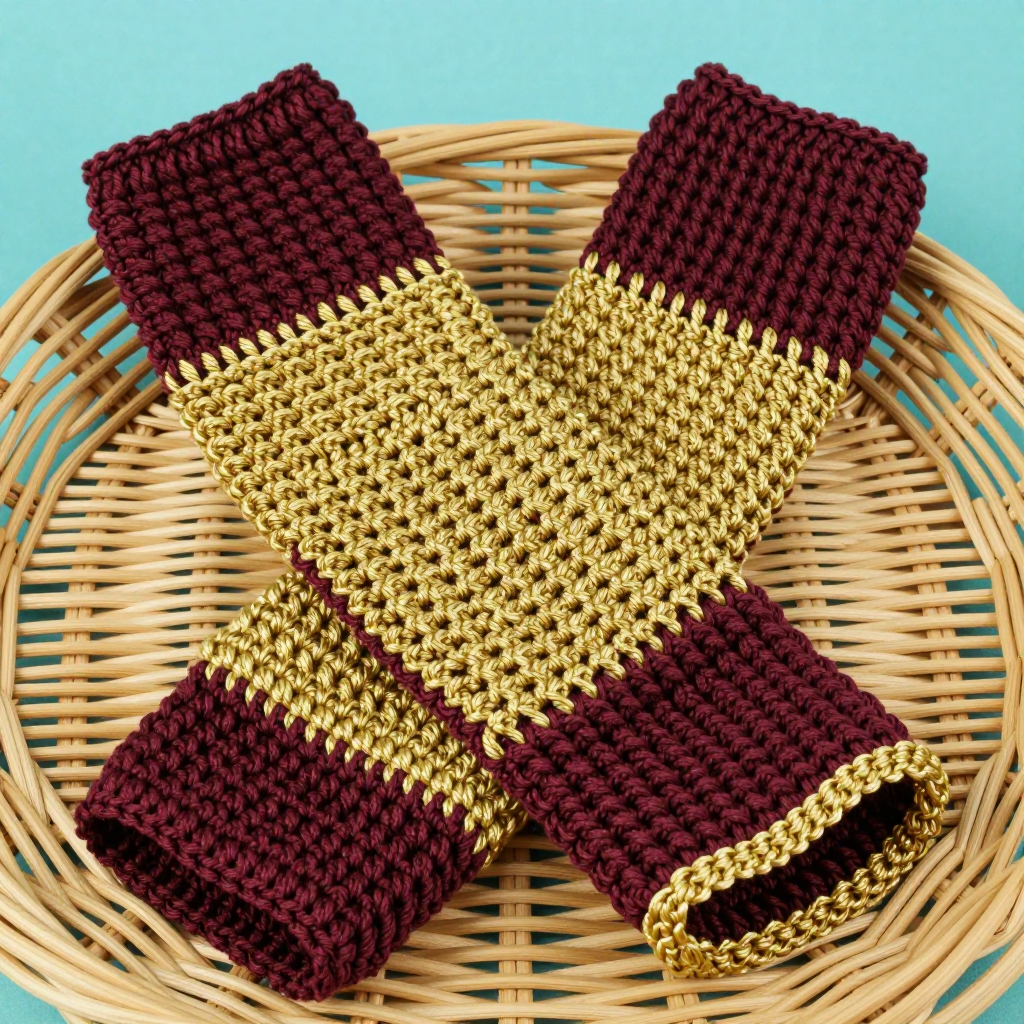
These Pine Tree Cuff Crochet Wrist Warmers are the perfect little project for anyone who wants a cozy, mountain-cabin-inspired accessory without a big time commitment. Worked in rich burgundy with a textured gold panel, they use post stitches and simple color changes to create a ribbed "pine tree" motif down one side of each warmer. The straight tube construction keeps things easy, and the small thumb opening means no fiddly shaping. Slip them on and they feel snug and warm around the wrist while your fingers stay free for texting, knitting, or holding a mug by the fire.
Materials Needed
- Yarn: Worsted weight (4) yarn, approximately 150 yards total — 100 yards burgundy (Color A), 50 yards gold (Color B). Sample uses an acrylic or wool blend.
- Hook: 3.25 mm (D/3) crochet hook
- Notions: Stitch marker, tapestry needle, scissors
- Finished size: Circumference 7 inches, length 8 inches (fits an average adult hand)
Abbreviations
- ch — chain
- sc — single crochet
- dc — double crochet
- fpdc — front post double crochet: work a double crochet around the post of the stitch below, from the front
- bpdc — back post double crochet: work a double crochet around the post of the stitch below, from the back
- sl st — slip stitch
- st(s) — stitch(es)
- rnd(s) — round(s)
- [ ] — repeat the instructions inside the brackets the number of times stated
Gauge
16 stitches and 16 rounds = 4 inches in single crochet. Work a small swatch in the round and measure it flat before starting so your warmers come out the right size.
Tips Before You Start
- Use a stitch marker at the start of each round so you always know where to join — the spiral of color changes makes the beginning of the round easy to lose.
- When you change colors, carry the unused color loosely up the inside of the tube rather than cutting it each time; this keeps the inside tidy and saves yarn.
- The post stitches are worked around the posts of the stitches in the round below, not into the top loops — keep your tension relaxed so the gold panel stays stretchy.
- Try the warmer on after Round 15 to check the thumb opening sits comfortably before you commit to the motif section.
Step-by-Step Instructions
Make one warmer as written, then repeat for the second (optionally reversing the color placement of the motif).
Cuff (Color A)
Set-up: Ch 28, join with sl st to first ch to form a ring, being careful not to twist.
Rnd 1: Ch 1, sc in each ch around, join with sl st to first sc (28 sts).
Rnds 2-4: Ch 1, sc in each st around, join with sl st to first sc (28 sts).
Change to Color B.
Rnd 5: Ch 1, sc in each st around, join with sl st to first sc (28 sts).
Change to Color A.
Rnds 6-7: Ch 1, sc in each st around, join with sl st to first sc (28 sts).
Body
Rnd 8: Ch 1, sc in first 13 sts, ch 2, skip 2 sts (thumb opening), sc in next 13 sts, join with sl st to first sc (26 sc, 2 ch).
Rnd 9: Ch 1, sc in each sc and in each ch around, join with sl st to first sc (28 sts).
Rnds 10-12: Ch 1, sc in each st around, join with sl st to first sc (28 sts).
Change to Color B.
Rnd 13: Ch 1, sc in each st around, join with sl st to first sc (28 sts).
Change to Color A.
Rnds 14-15: Ch 1, sc in each st around, join with sl st to first sc (28 sts).
Pine Tree Motif (Color B on Color A background)
Rnd 16: Ch 1, sc in first 14 sts, change to B, sc in next 14 sts, join with sl st to first sc (28 sts).
Rnd 17: Ch 1, sc in first 14 sts, change to B, [fpdc around next st, bpdc around next st] 7 times, join with sl st to first sc (28 sts).
Rnd 18: Ch 1, sc in first 14 sts, change to B, [bpdc around next st, fpdc around next st] 7 times, join with sl st to first sc (28 sts).
Rnds 19-40: Repeat Rnds 17-18 eleven times, ending with a Rnd 18 repeat (28 sts each rnd).
Change to Color A.
Rnds 41-42: Ch 1, sc in each st around, join with sl st to first sc (28 sts).
Change to Color B.
Rnd 43: Ch 1, sc in each st around, join with sl st to first sc (28 sts).
Change to Color A.
Rnds 44-45: Ch 1, sc in each st around, join with sl st to first sc (28 sts). Fasten off.
Thumb Edging (Color B)
Join B to the thumb opening, ch 1, sc evenly around the opening (about 10 sc), join with sl st to first sc. Fasten off.
Assembly and Finishing
Weave in all ends on the wrong side, using the tapestry needle to run each tail through a few stitches so it stays secure. There is no seaming — each warmer is a finished tube straight off the hook. Block lightly by misting with water and patting into shape flat, or steam gently over a towel, keeping the iron off the post stitches so the texture stays raised. Let dry completely before wearing. Make the second warmer the same way, or reverse the color placement of the motif for a mirrored pair.
Pro Tips and Variations
- Swap burgundy and gold so the motif panel is burgundy on a gold background for a lighter, brighter pair.
- Add a second gold accent round at the cuff and top edge for a bolder striped look.
- Work the motif section in a contrasting green for a classic pine tree effect, or add a small embroidered star above the panel.


