Ocean Blue Flower Motif Crochet Throw Free Pattern
Introduction
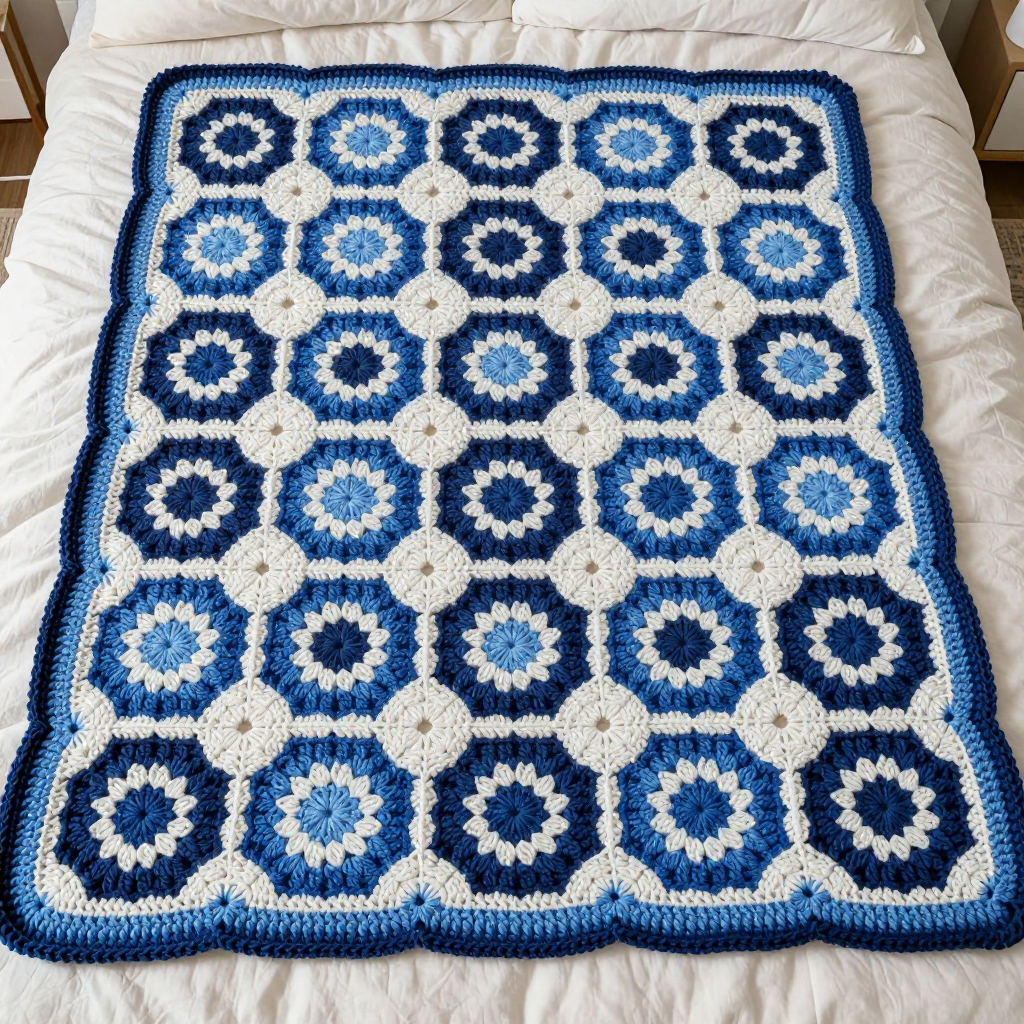
This Ocean Blue Flower Motif Throw is a cozy, beginner-friendly project that turns a simple six-lobed flower motif into a full-size blanket. It's perfect for anyone who has mastered basic crochet stitches and wants to try motif work without committing to a complicated pattern. The throw is worked in three shades of ocean blue, so the finished piece looks like rippling water dotted with flowers. Each motif is soft, flat, and about 4 inches across, and the join-as-you-go method means you never have to sew a giant pile of squares together at the end. The result is a warm, drapey throw with a dark blue picot border that gives it a tidy, handmade finish.
Materials Needed
- Yarn: Worsted weight (Category 4) acrylic yarn, approximately 1800 yards total: Color A (Light Blue) 600 yards, Color B (Medium Blue) 600 yards, Color C (Dark Blue) 600 yards.
- Hook: 5.0 mm (H-8) crochet hook.
- Notions: Yarn needle, scissors, stitch markers (optional), tape measure.
- Finished size: Approximately 40 inches (102 cm) wide by 48 inches (122 cm) long, including border.
Abbreviations
- ch — chain
- sl st — slip stitch
- sc — single crochet
- dc — double crochet
- sp — space
- st(s) — stitch(es)
- rep — repeat
- rnd — round
Gauge
Each motif measures 4 inches (10 cm) in diameter after blocking. Work one motif and measure across its widest point; if it is larger or smaller, adjust your hook size up or down until it matches.
Tips Before You Start
- Make one practice motif first and block it to confirm your 4-inch gauge before crocheting all 120.
- Keep your tension relaxed on the ch-5 and ch-3 spaces so the motifs stay flat and don't cup.
- Sort your finished motifs into three piles by color as you go, so arranging the grid later is quick and easy.
- If you choose join-as-you-go, lay out the full grid on the floor first and photograph it so you can follow your color sequence.
Step-by-Step Instructions
Flower Motif (make 120: 40 each in A, B, and C)
With chosen color, ch 4, join with sl st to form ring.
Rnd 1: Ch 3 (counts as dc), 11 dc in ring, join with sl st to top of ch-3 (12 dc).
Rnd 2: Ch 1, sc in same st, [ch 3, skip next dc, sc in next dc] rep around, join with sl st to first sc (6 ch-3 sps).
Rnd 3: Sl st in first ch-3 sp, ch 3, (dc, ch 2, 2 dc) in same sp, [2 dc, ch 2, 2 dc] in each ch-3 sp around, join with sl st to top of ch-3 (24 dc, 6 ch-2 sps).
Rnd 4: Sl st to next ch-2 sp, ch 1, sc in same sp, [ch 5, sc in next ch-2 sp] rep around, join with sl st to first sc (6 ch-5 sps).
Rnd 5: Sl st in first ch-5 sp, ch 3, (2 dc, ch 2, 3 dc) in same sp, [3 dc, ch 2, 3 dc] in each ch-5 sp around, join with sl st to top of ch-3 (36 dc, 6 ch-2 sps). Fasten off.
Joining Motifs
Arrange motifs in a grid of 10 motifs wide by 12 motifs tall, alternating colors A, B, and C in a random or patterned sequence.
Join-as-you-go: Work Rnd 5 of each motif, joining to adjacent motifs at the ch-2 sps and dc stitches. When working a ch-2 sp that meets a joining point, instead of ch 2, work ch 1, sl st in the corresponding ch-2 sp of the adjacent motif, ch 1. For dc stitches, replace the central dc of a 3-dc group with a sl st in the corresponding dc of the adjacent motif.
Alternative: Join motifs by sewing with a yarn needle using mattress stitch, matching stitches.
Border
Rnd 1: With right side facing, join Color C with sl st in any corner ch-2 sp, ch 3, (2 dc, ch 2, 3 dc) in same sp, *dc evenly along side to next corner ch-2 sp, (3 dc, ch 2, 3 dc) in corner sp; rep from * around, join with sl st to top of ch-3.
Rnd 2: Ch 1, sc in each dc around, working (sc, ch 2, sc) in each corner ch-2 sp, join with sl st to first sc.
Rnd 3: Ch 1, sc in same st, *ch 3, sl st in third ch from hook (picot), skip next sc, sc in next sc; rep from * around, adjusting to end with sc in last sc, join with sl st to first sc. Fasten off.
Assembly and Finishing
If you used join-as-you-go, your grid is already assembled. If you sewed the motifs, work the mattress stitch seams with matching yarn, matching stitch for stitch along the motif edges. Weave in all ends on the wrong side, threading each tail through several stitches before trimming. Block lightly to measurements: mist the throw, pin it to a flat surface at 40 by 48 inches, and let it dry completely so the motifs lie flat and the picot edge sits neatly.
Pro Tips and Variations
- For a softer, drapier throw, substitute a wool-blend worsted yarn; just check your gauge again.
- Try a two-color palette (light and dark blue only) for a bolder, more graphic look.
- Add a fourth border round of half double crochet in Color A for a wider, contrasting frame.