Lichen Spotted Pig Crochet Free Pattern
Introduction
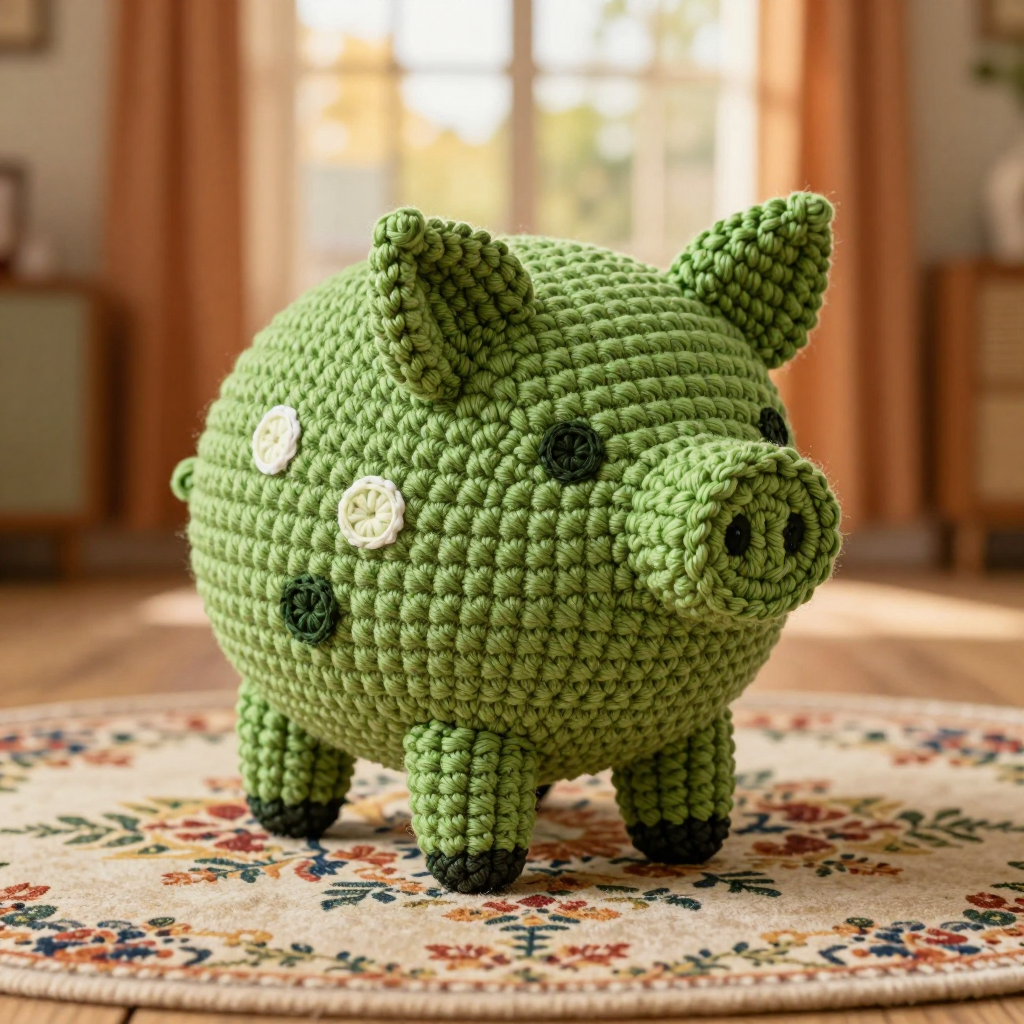
Meet the Lichen Spotted Pig, a tiny moss-green desk buddy with a cozy Nordic winter soul. This beginner-friendly amigurumi is built from one simple stuffed sphere, four short cylinder legs, two folded triangle ears, and a little round snout, then dressed up with scattered lichen-colored spot appliqués. It works up quickly in worsted cotton and feels smooth and firm in the hand, about the size of a small plum. Perfect for stash-busting, gift toppers, or a calm autumn afternoon project, it is an advanced beginner pattern that only uses single crochet, increases, and decreases.
Materials Needed
- Yarn: Worsted weight cotton, approx. 50 g / 85 yds total. Color A (Moss green): 30 yds; Color B (Lichen light green): 10 yds; Color C (Dark lichen): 5 yds.
- Hook: 3.5 mm (E-4) crochet hook.
- Notions: Stitch marker, tapestry needle, polyester fiberfill stuffing, scissors.
- Finished size: Approx. 3.5 inches (9 cm) tall and 4 inches (10 cm) long.
Abbreviations
- MR – magic ring: an adjustable loop you work the first stitches into.
- sc – single crochet.
- inc – increase: work 2 sc into the same stitch.
- dec – decrease: work 2 stitches together into 1 sc.
- ch – chain.
- st(s) – stitch(es).
- rnd(s) – round(s), worked in a continuous spiral unless noted.
- FO – fasten off.
Gauge
20 sc x 22 rnds = 4 inches (10 cm) in single crochet. Work a small flat swatch and measure the middle of it; if your stitches are larger than this, go down a hook size so the stuffing does not show through.
Tips Before You Start
- Work in a continuous spiral and move your stitch marker at the start of every round so you never lose your place.
- Keep your tension tight and even; amigurumi fabric should be dense enough that the fiberfill stays hidden.
- Stuff the body firmly but in small pinches as you close the last rounds, so the oval shape stays smooth.
- Pin all parts in place before sewing, and use the same yarn color as the part you are attaching for invisible seams.
Step-by-Step Instructions
Body (Color A)
Rnd 1: MR, 6 sc (6 sts).
Rnd 2: inc x6 (12 sts).
Rnd 3: [sc, inc] x6 (18 sts).
Rnd 4: [2 sc, inc] x6 (24 sts).
Rnd 5: [3 sc, inc] x6 (30 sts).
Rnds 6-12: sc in each st around (30 sts).
Rnd 13: [3 sc, dec] x6 (24 sts).
Rnd 14: [2 sc, dec] x6 (18 sts).
Rnd 15: [sc, dec] x6 (12 sts).
Stuff firmly.
Rnd 16: dec x6 (6 sts).
FO, leaving a long tail. Thread the tail through the front loops of the last 6 sts and pull closed.
Legs (make 4, Color A)
Rnd 1: MR, 6 sc (6 sts).
Rnds 2-5: sc in each st around (6 sts).
FO, leaving a tail. Do not stuff. Sew the legs to the bottom of the body at evenly spaced positions.
Ears (make 2, Color A)
Row 1: Ch 4, sc in 2nd ch from hook, sc in next ch, 2 sc in last ch (4 sts).
Row 2: sc across (4 sts).
FO, leaving a tail. Fold each ear and sew to the top of the head.
Snout (Color A)
Rnd 1: MR, 6 sc (6 sts).
Rnd 2: inc x6 (12 sts).
Rnd 3: sc in each st around (12 sts).
FO, leaving a tail. Sew the snout to the front of the face, then embroider two small nostrils with Color C.
Spots (Colors B and C)
Make 3-5 spots in varying sizes.
Small spot (B): MR, 4 sc, join to first st (4 sts). FO, leave a tail.
Medium spot (C): MR, 6 sc, join to first st (6 sts). FO, leave a tail.
Sew the spots randomly on the body.
Assembly and Finishing
Sew the legs, ears, snout, and spots securely with the tails you left, checking placement from all sides before you knot anything. Weave in all ends on the wrong side of the piece. Gently shape the body with your fingers, then lightly steam or mist block the pig and let it dry fully so the stitches settle evenly.
Pro Tips and Variations
- Swap Color A for a soft gray or cream for a classic Nordic palette, keeping the lichen spots as the accent.
- Use a 3.0 mm hook for a smaller, firmer pig, or a 4.0 mm hook for a slightly larger desk buddy.
- Add a tiny hanging loop of chain stitches at the top of the head to turn it into a bag charm or ornament.


