Lavender Blossom Pan Protector Free Crochet Pattern
Lavender Blossom Pan Protector — Free Crochet Pattern
Introduction
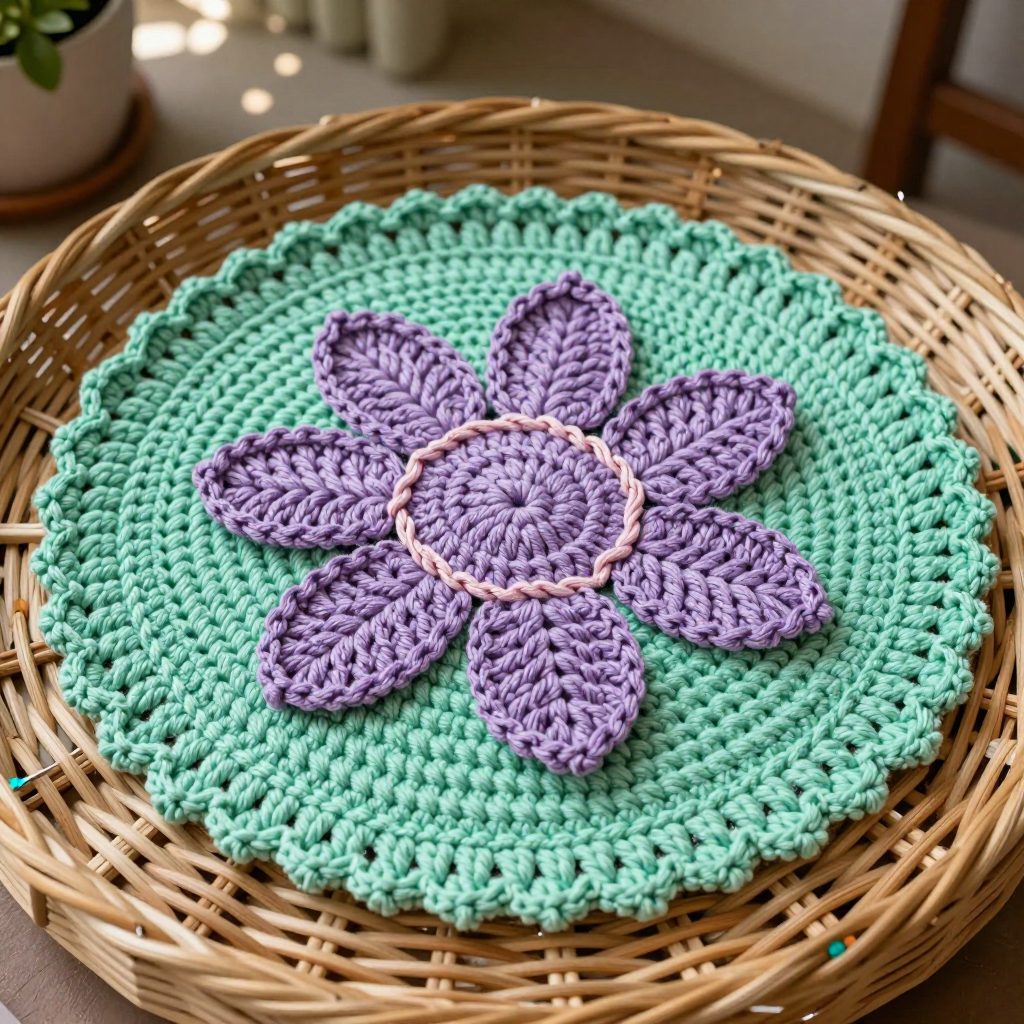
This Lavender Blossom Pan Protector is a sweet little project for anyone who wants their kitchen to feel a bit softer and more charming. It's a flat, 8-inch mint circle topped with a five-petal lavender flower, so it looks like a tiny bouquet resting on your counter. It's beginner-friendly because it uses only single crochet, increases, and simple decreases — no complicated stitches anywhere. Slip it between your pans to keep them from scratching, or use it as a trivet and let that ballet-core lavender and mint combo do the decorating.
Materials Needed
- Yarn: Worsted weight (4) cotton yarn — 50 yds lavender, 80 yds mint. Cotton is best because it handles heat and washes well.
- Hook: 5.5 mm (I-9) crochet hook
- Notions: Stitch marker, tapestry needle, scissors, sewing pins
- Finished size: Approximately 8 inches in diameter
Abbreviations
- ch — chain: yarn over and pull through the loop on your hook.
- sc — single crochet: insert hook, yarn over, pull up a loop, yarn over, pull through both loops.
- inc — increase: work 2 single crochet into the same stitch.
- sc2tog — single crochet two together: insert hook into the next stitch, pull up a loop, insert hook into the following stitch, pull up a loop, yarn over, pull through all 3 loops.
- MR — magic ring: an adjustable loop you crochet into to start a circle.
- sl st — slip stitch: insert hook, yarn over, pull through both the stitch and the loop on your hook.
- sts — stitches
- Rnd — round (worked in a circle)
- Row — row (worked back and forth)
Gauge
12 stitches and 12 rounds = 4 inches in single crochet. Make a small swatch and measure it flat; if you get more stitches than 12 in 4 inches, go up a hook size, and if you get fewer, go down.
Tips Before You Start
- Work the mint circle loosely and keep your increases evenly spaced — that's what keeps it flat instead of domed.
- Mark the first stitch of each round with a stitch marker so you never lose your place.
- Pin the petals in place before sewing. The 0.5-inch overlap on the flower center is what makes the blossom look full.
- Use a smaller hook (or just snug tension) for the final edging so the border stays crisp and doesn't ruffle.
Step-by-Step Instructions
Background Circle (Mint)
Rnd 1: MR, 6 sc into the ring (6 sts).
Rnd 2: inc x6 (12 sts).
Rnd 3: [sc, inc] x6 (18 sts).
Rnd 4: [2 sc, inc] x6 (24 sts).
Rnd 5: [3 sc, inc] x6 (30 sts).
Rnd 6: [4 sc, inc] x6 (36 sts).
Rnd 7: [5 sc, inc] x6 (42 sts).
Rnd 8: [6 sc, inc] x6 (48 sts).
Rnd 9: [7 sc, inc] x6 (54 sts).
Rnd 10: [8 sc, inc] x6 (60 sts).
Rnd 11: [9 sc, inc] x6 (66 sts).
Rnd 12: [10 sc, inc] x6 (72 sts). Fasten off.
Petals (Lavender, make 5)
Row 1: Ch 10, sc in 2nd ch from hook and in each ch across (9 sts).
Row 2: Ch 1, turn, sc in each st across (9 sts).
Row 3: Ch 1, turn, sc2tog, sc in next 5 sts, sc2tog (7 sts).
Row 4: Ch 1, turn, sc in each st across (7 sts).
Row 5: Ch 1, turn, sc2tog, sc in next 3 sts, sc2tog (5 sts).
Row 6: Ch 1, turn, sc in each st across (5 sts).
Row 7: Ch 1, turn, sc2tog, sc in next st, sc2tog (3 sts).
Row 8: Ch 1, turn, sc in each st across (3 sts).
Row 9: Ch 1, turn, sc2tog, sc in next st (2 sts).
Row 10: Ch 1, turn, sc2tog (1 st). Fasten off.
Flower Center (Lavender)
Rnd 1: MR, 6 sc into the ring (6 sts).
Rnd 2: inc x6 (12 sts).
Rnd 3: [sc, inc] x6 (18 sts). Fasten off, leaving a long tail.
Assembly of the Flower Motif
Arrange the 5 petals evenly around the flower center, overlapping the center's edge by 0.5 inch. Pin in place. Using the lavender tail, sew the petals to the center. Place the finished flower motif on the mint circle, centered. Sew the flower to the background using mint yarn, catching both the petals and the center. Weave in ends.
Edging (Mint)
Rnd 1: Join mint to any stitch on the outer edge of the background, sc in each st around (72 sts).
Rnd 2: [sc, ch 1, skip 1] around. Join with sl st. Fasten off. Weave in ends.
Assembly and Finishing
If you haven't already, sew the petals to the flower center first, then sew the whole flower to the mint circle so it sits centered. Weave in all ends on the wrong side, threading each tail through a few stitches before trimming. Block the finished protector by misting it lightly with water and pinning it flat into a circle on a towel or blocking mat; let it dry completely so the edges lie perfectly flat. Press gently with a warm iron if needed, but keep the iron off the raised flower.
Pro Tips and Variations
- Make a set in different flower colors — dusty rose, butter yellow, or sage — for a coordinated kitchen drawer.
- Add a hanging loop by chaining 10 and sl st joining to the edging before you fasten off.
- Use two strands of yarn held together for a thicker, extra-padded trivet version.