Cloud Nine Baby Romper: Free Crochet Pattern
Introduction
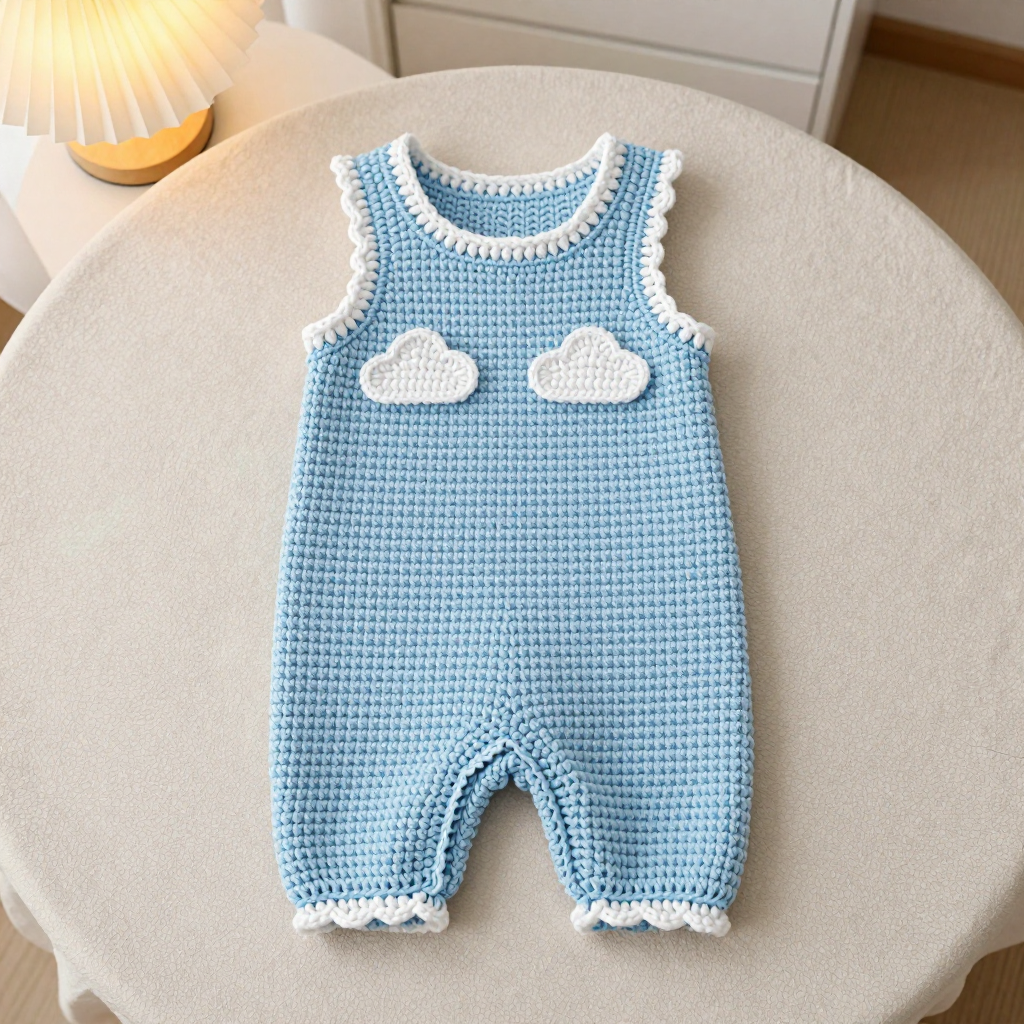
The Cloud Nine Baby Romper is a dreamy little outfit for babies aged 0–3 months, worked in soft pale sky blue with a white scalloped neckline and two fluffy cloud appliqués on the chest. It's designed especially for beginners: the body is a simple straight tube of double crochet with no waist or armhole shaping, and the legs are short tubes worked around the leg openings. The smooth double crochet fabric feels light and airy, while the scalloped single crochet trim adds just a touch of sweetness. Whether you're making your first baby garment or a quick handmade gift, this romper comes together with just two basic stitches and a whole lot of charm.
Materials Needed
- Yarn: Fine (2) weight yarn, acrylic or cotton, 50 g / 175 yds per skein — 2 skeins pale sky blue (Color A), 1 skein white (Color B)
- Hook: 3.25 mm (US D/3)
- Notions: Tapestry needle for seaming and weaving in ends, stitch marker, scissors, measuring tape
- Finished size: 0–3 months — chest 19", length 15", neck opening 16"
Abbreviations
- ch — chain: make a loop of yarn and pull it through the loop on your hook
- sl st — slip stitch: insert hook, yarn over, pull through everything on the hook
- sc — single crochet: insert hook, yarn over, pull up a loop, yarn over, pull through both loops
- dc — double crochet: yarn over, insert hook, pull up a loop, yarn over and pull through 2 loops, yarn over and pull through last 2 loops
- sk — skip: miss the next stitch without working into it
- beg — beginning
- RS — right side: the outside, public face of the fabric
- rep — repeat
- sts — stitches
Gauge
22 sts x 12 rows = 4" (10 cm) in double crochet. To check, crochet a small swatch in dc and measure a 4" section — if you have more stitches than 22, go up a hook size; if fewer, go down.
Tips Before You Start
- When you join the starting chain into a ring, double-check it isn't twisted before working Round 1 — a twist here can't be fixed later.
- Use a stitch marker at the beginning of each round so you always know where to join.
- Keep your tension relaxed and even; the body is a straight tube, so consistent dc height keeps the chest measurement accurate.
- Work the neck edging and appliqués after the body and legs are finished so you can position the clouds evenly.
Step-by-Step Instructions
Body (Color A)
Setup: Ch 106, join with sl st to first ch to form a ring, being careful not to twist.
Rnd 1: Ch 3 (counts as first dc), dc in each ch around, join with sl st to top of beg ch-3 (106 dc).
Rnds 2–20: Ch 3, dc in each st around, join (106 dc).
Fasten off.
Legs (Color A) — make 2
Rnd 1: With RS facing, attach A at the side seam of the body at the underarm, ch 3, work 26 dc evenly around the leg opening, join (27 dc).
Rnds 2–8: Ch 3, dc in each st around, join (27 dc).
Fasten off. Repeat for the second leg. Sew the leg openings closed if desired.
Neck Edging (Color B)
Rnd 1: With RS facing, attach B at the back neck, ch 1, sc in each st around the neck opening, join (106 sc).
Rnd 2: Ch 1, [sc, ch 2, sc] in first sc, *sk next sc, [sc, ch 2, sc] in next sc; rep from * around, join.
Fasten off.
Cloud Appliqué (Color B) — make 2
Setup: Ch 6.
Rnd 1: Sc in 2nd ch from hook, sc in next 3 ch, 3 sc in last ch; working along the opposite side of the ch, sc in next 4 ch, 3 sc in last ch, join (14 sc).
Rnd 2: Ch 1, sc in each sc around, join (14 sc).
Rnd 3: Ch 1, [sc in next 2 sc, 2 sc in next sc] rep around, join (18 sc).
Fasten off, leaving a long tail for sewing.
Assembly and Finishing
Sew the cloud appliqués to the front of the body, positioning them side by side about 2" below the neckline. Use the long tails and a tapestry needle, catching only the surface of the body fabric so the stitches don't show on the inside. Weave in all ends neatly on the wrong side. Block the romper lightly by misting with water and patting into shape, then lay flat to dry — this smooths the scalloped edging and helps the clouds lie flat.
Pro Tips and Variations
- Swap the white edging for a soft lemon or mint to change the look without altering the pattern.
- Add a third cloud appliqué or scatter tiny white sc "stars" around the chest for extra detail.
- For a slightly warmer romper, work the body in a soft cotton-blend DK held double, checking gauge first.