Chevron Shrug with Blush Trim Free Crochet Pattern
Introduction
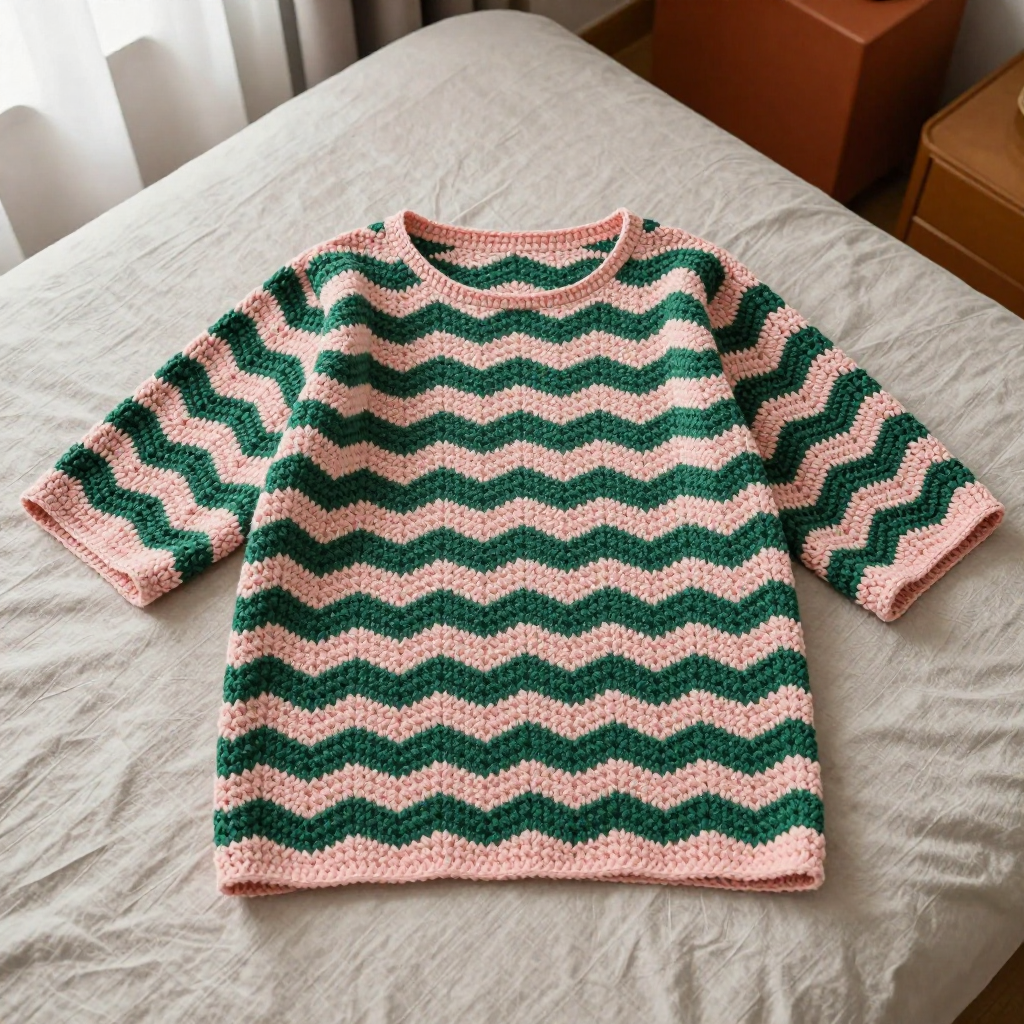
This chevron shrug is the perfect first garment for a crocheter who has mastered the basics and wants something wearable to show for it. It's made from one simple rectangle of ripple stitch, folded and seamed into sleeves, so there's no shaping, no armhole math, and no complicated construction to worry about. The emerald and blush stripes zigzag across the back and wrap around your shoulders, while a soft blush single crochet border frames the opening and each sleeve. Worked in a worsted weight alpaca blend, it feels light and drapey on the shoulders, warm without bulk, and looks just as good over a plain tee as it does dressed up for an evening out.
Materials Needed
- Yarn: Worsted weight alpaca blend (about 70% alpaca, 30% wool), approximately 400 yds total: 300 yds emerald (Color A) and 100 yds blush (Color B).
- Hook: 5.5 mm (US I-9) crochet hook.
- Notions: Tapestry needle for seaming and weaving in ends, stitch markers, scissors, and a tape measure.
- Finished size: To fit bust 34–38 inches. The rectangle measures 40 inches wide x 20 inches long; the finished shrug is approximately 40 inches in circumference and 20 inches long, with 6-inch sleeve openings.
Abbreviations
- ch – chain: make a loop of yarn and pull it through the loop on your hook.
- dc – double crochet: yarn over, insert hook in stitch, pull up a loop, yarn over and pull through 2 loops, yarn over and pull through the last 2 loops.
- dc3tog – double crochet 3 together: a decrease worked over 3 stitches that forms the valley of the chevron (yarn over, insert hook in stitch, pull up a loop, yarn over and pull through 2 loops; repeat in each of the next 2 stitches, then yarn over and pull through all 4 loops on the hook).
- sc – single crochet: insert hook in stitch, pull up a loop, yarn over and pull through both loops.
- sl st – slip stitch: insert hook in stitch, yarn over and pull through both the stitch and the loop on your hook.
- st(s) – stitch(es).
- rep – repeat.
Gauge
14 stitches and 8 rows = 4 inches in the chevron pattern. To check it, crochet a small swatch of the chevron pattern and measure the middle of the fabric with a tape measure; if you have more stitches than 14 in 4 inches, go up a hook size, and if you have fewer, go down.
Tips Before You Start
- Count your peaks and valleys. Each repeat of the chevron uses 12 stitches, and every row should end with 140 stitches. Count at the end of each row until the rhythm feels automatic.
- Keep your turning chain loose. The ch 3 at the start of each row counts as your first dc, so keep it relaxed so the edge doesn't pull in.
- Change colors on the last stitch of the row. Work the final yarn over of the last dc of a stripe row with the new color so the color change is clean and invisible.
- Try it on before seaming. Fold and pin the rectangle first, then slip it over your shoulders to check the sleeve opening before you commit to the seam.
Step-by-Step Instructions
Rectangle (Color A and Color B)
Row 1: With A, ch 141. 2 dc in 4th ch from hook (counts as first dc), *dc in next 5 ch, dc3tog, dc in next 5 ch, 3 dc in next ch; rep from * to last 12 ch, dc in next 5 ch, dc3tog, dc in next 5 ch, 2 dc in last ch (140 sts).
Row 2: Ch 3 (counts as dc), 2 dc in first st, *dc in next 5 sts, dc3tog, dc in next 5 sts, 3 dc in next st; rep from * to last 12 sts, dc in next 5 sts, dc3tog, dc in next 5 sts, 2 dc in last st (140 sts).
Rows 3–4: Rep Row 2 (140 sts). Change to B at the end of Row 4.
Rows 5–6: With B, rep Row 2 (140 sts). Change to A at the end of Row 6.
Rows 7–10: With A, rep Row 2 (140 sts). Change to B at the end of Row 10.
Rows 11–12: With B, rep Row 2 (140 sts). Change to A at the end of Row 12.
Rows 13–16: With A, rep Row 2 (140 sts). Change to B at the end of Row 16.
Rows 17–18: With B, rep Row 2 (140 sts). Fasten off. (18 rows total)
Border (Color B)
Rnd 1: Join B to one short edge of the rectangle. Work sc evenly around the entire perimeter, working 3 sc in each corner. Join with sl st to first sc. Fasten off.
Sleeve Edging (Color B)
Rnd 1: Join B to one sleeve opening. Work 1 round of sc evenly around the opening. Join with sl st. Fasten off. Rep for the other sleeve.
Assembly and Finishing
Fold the rectangle in half lengthwise with right sides together. Seam the short edges from the outer edge inward, leaving a 6-inch opening at each end for the sleeves. Turn the shrug right side out. Weave in all ends with the tapestry needle, working them through the wrong side of the fabric in a few directions so they don't work loose. Block gently: mist the shrug lightly with water, pat it into shape on a towel, and let it dry flat, easing the chevron points straight and the border flat. Do not hang it while damp.
Pro Tips and Variations
- Make it longer: Add extra chevron rows in multiples of 6 (one full stripe of 4 rows A and 2 rows B) for a longer, tunic-style shrug.
- Change the palette: Swap the blush for cream or mustard for a softer or bolder look, keeping the same stripe sequence.
- Add a little weight: Work the border in a contrasting texture, such as a round of sc followed by a round of reverse sc, for a more defined edge.


