Apricot Velvet Robot Crochet Free Pattern
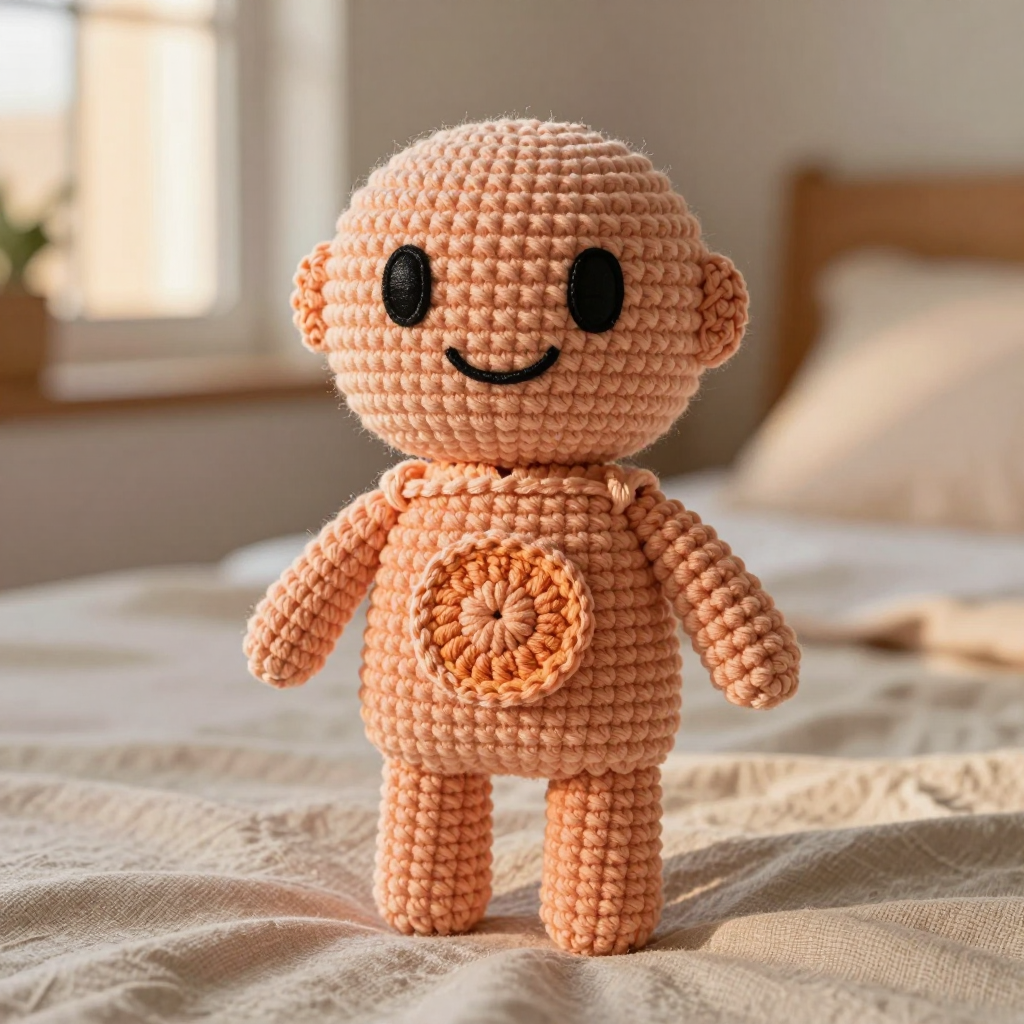
Apricot Velvet Robot Crochet Free Pattern
Introduction
This little apricot velvet robot is the perfect cuddle-sized companion for anyone who loves soft, quirky amigurumi. With its round head, flat rectangular body, and tiny stubby limbs, it has a gentle Scandinavian look that feels both modern and cozy. The velvet yarn gives it a plush, velvety finish that is irresistible to hold, and the little peach pumpkin patch on its chest adds a warm touch of fall. It is a wonderful project for crocheters who are comfortable with single crochet and simple shaping, and it works up quickly in an evening or two.
Materials Needed
- Yarn: Velvet yarn, bulky weight (approx. 100 g / 100 m per skein), 100% polyester. Color A (apricot): approx. 50 g. Color B (peach): approx. 10 g.
- Embroidery floss: Small amount of black for the eyes and smile.
- Hook: 4.0 mm (US G-6).
- Notions: Tapestry needle, stitch marker, scissors, small amount of polyester fiberfill for stuffing the head, arms, and legs.
- Finished size: Approx. 5 inches (12.5 cm) tall.
Abbreviations
- MR: Magic ring — an adjustable loop used to start working in the round.
- sc: Single crochet — insert hook, yarn over, pull up a loop, yarn over, pull through both loops.
- inc: Increase — work 2 single crochet stitches into the same stitch.
- dec: Decrease — work 2 single crochet stitches together into one.
- ch: Chain — yarn over and pull through the loop on the hook.
- sts: Stitches.
- Rnd: Round — a complete circle of stitches worked in the round.
- R: Row — a single line of stitches worked flat.
Gauge
16 single crochet stitches x 18 rows = 4 inches (10 cm) in single crochet. To check your gauge, crochet a small swatch in single crochet with your 4.0 mm hook and velvet yarn, then measure a 4-inch section to confirm you have 16 stitches and 18 rows.
Tips Before You Start
- Velvet yarn can shed and slip: Work with a slightly firmer tension than usual, and avoid frogging too often, as velvet fibers can mat. Keep your hook size consistent so the fabric stays dense enough to hold stuffing.
- Stuff lightly and evenly: Overstuffing will stretch the velvet and distort the round head. Add small amounts of fiberfill as you close each piece, especially the head, so it keeps a smooth sphere shape.
- Mark your rounds: Because velvet stitches are hard to see, place a stitch marker at the beginning of each round and count your stitches at the end of every round to stay on track.
- Embroider the face before assembly: It is much easier to satin-stitch the oval eyes and curved smile on the flat head before sewing the head to the torso.
Step-by-Step Instructions
Head (Color A)
Rnd 1: MR, 6 sc (6 sts).
Rnd 2: inc x6 (12 sts).
Rnd 3: [sc, inc] x6 (18 sts).
Rnd 4: [2 sc, inc] x6 (24 sts).
Rnds 5-8: sc in each st around (24 sts).
Rnd 9: [2 sc, dec] x6 (18 sts).
Rnd 10: [sc, dec] x6 (12 sts).
Rnd 11: dec x6 (6 sts).
Fasten off, leaving a short tail. Stuff the head lightly and evenly, then weave the tail through the remaining 6 stitches and pull closed.
Torso (Color A)
Row 1: Ch 7, sc in the 2nd ch from hook and in each ch across (6 sts).
Rows 2-12: sc in each st across (6 sts).
Fasten off, leaving a long tail for sewing. The torso is a flat rectangle about 1.5 inches wide by 3 inches long.
Arms (make 2, Color A)
Rnd 1: MR, 4 sc (4 sts).
Rnds 2-6: sc in each st around (4 sts).
Fasten off, leaving a tail for sewing. Stuff each arm lightly.
Legs (make 2, Color A)
Rnd 1: MR, 4 sc (4 sts).
Rnds 2-5: sc in each st around (4 sts).
Fasten off, leaving a tail for sewing. Stuff each leg lightly.
Pumpkin Patch (Color B)
Rnd 1: MR, 6 sc (6 sts).
Rnd 2: inc x6 (12 sts).
Rnd 3: [sc, inc] x6 (18 sts).
Fasten off, leaving a tail for sewing. The patch is a flat circle about 1.2 inches across.
Face (Black Embroidery Floss)
Eyes: Using satin stitch, embroider two oval eyes on the head, each about 0.5 inch (1.3 cm) wide, spaced evenly apart.
Smile: Embroider a small curved line below the eyes with black floss to form a gentle smile.
Assembly and Finishing
Sew the torso to the bottom of the head, aligning the top edge of the rectangle with the lower curve of the head. Sew the arms to the sides of the torso, positioning them about halfway down. Sew the legs to the bottom edge of the torso, spacing them evenly. Sew the peach pumpkin patch to the center front of the torso. Weave in all ends securely, using a tapestry needle to hide them inside the pieces. Gently shape the robot with your fingers and lightly steam or block the velvet pieces to smooth the surface and settle the stitches.
Pro Tips and Variations
- Color swap: Use a soft sage green or dusty blue velvet for a different seasonal robot, keeping the peach pumpkin patch as a contrast.
- Add a hanging loop: Before closing the head, crochet a small chain loop and attach it to the top so the robot can hang as a decoration.
- Textured patch: Work the pumpkin patch in a slightly smaller hook size to make it firmer, or add a tiny embroidered stem in brown floss for extra detail.