Apricot Stripe Pig Body Pillow Free Crochet Pattern
Introduction
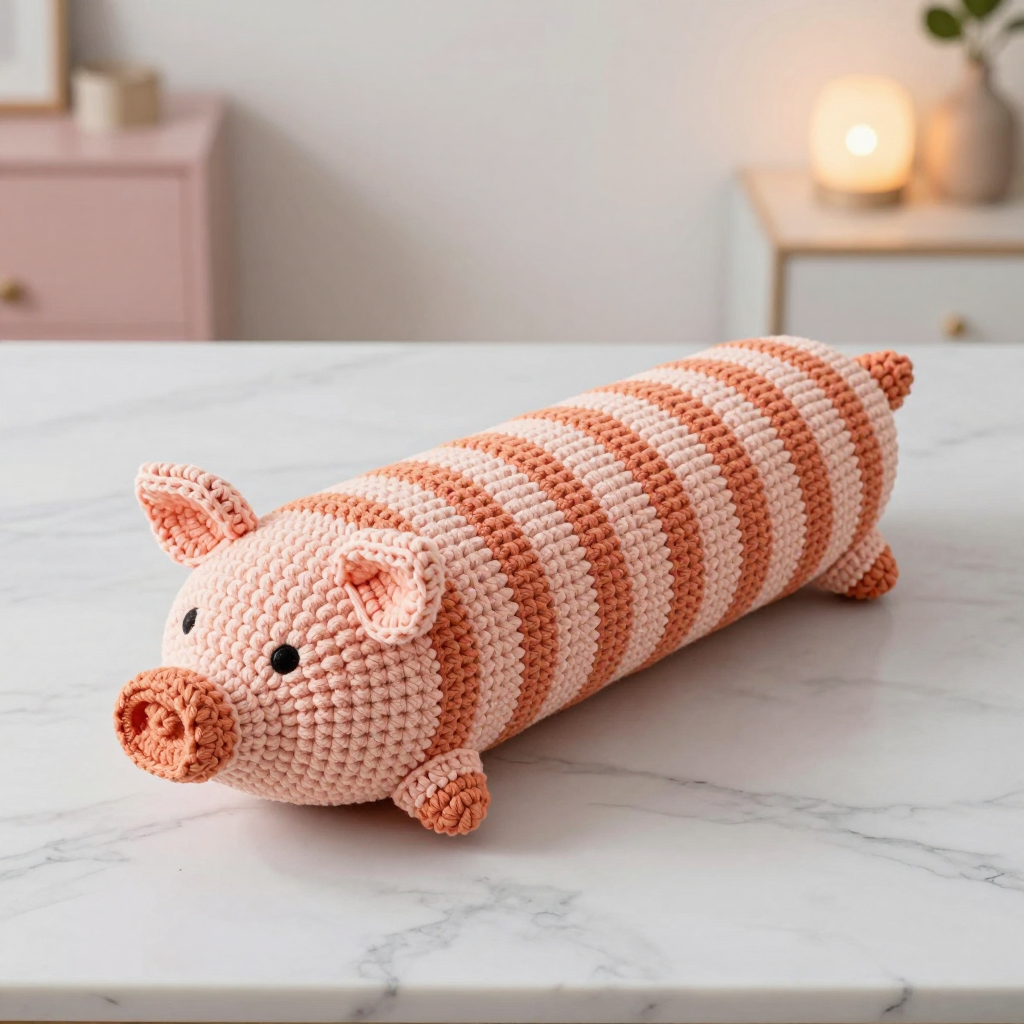
This Apricot Stripe Pig Body Pillow is the perfect first big project for anyone who has mastered single crochet and wants something soft, squishy, and a little bit silly to show for it. Worked in chunky chenille, it comes together as one long straight tube with alternating peach and apricot stripes that give it a cheerful retro 90s look. The finished pillow is about 26 inches long and 12 inches around, so it is big enough to hug, lean on, or tuck behind your back on the couch. With only single crochet, simple decreases, and a tiny snout and two ears to sew on at the end, it is a wonderfully forgiving project that looks and feels like a store-bought plush.
Materials Needed
- Yarn: Worsted weight acrylic chenille, 2 colors: Color A peach (approx. 320 yd / 290 m) and Color B apricot (approx. 320 yd / 290 m).
- Hook: 5.0 mm (US H-8).
- Notions: Stitch marker, tapestry needle, scissors, polyester fiberfill for stuffing the body and lightly stuffing the snout.
- Finished size: Approx. 12 in (30 cm) circumference x 26 in (66 cm) long, plus snout and ears.
Abbreviations
- ch – chain: make a loop of yarn and pull it through the loop on your hook.
- sl st – slip stitch: insert hook, yarn over, pull through both the stitch and the loop on your hook.
- sc – single crochet: insert hook into stitch, yarn over, pull up a loop, yarn over, pull through both loops.
- inc – increase: work 2 single crochet into the same stitch.
- sc2tog – single crochet two together: a decrease that joins 2 stitches into 1.
- MR – magic ring: an adjustable loop used to start working in the round.
- st(s) – stitch(es).
- rnd(s) – round(s).
Gauge
12 sc x 13 rnds = 4 in (10 cm) in single crochet worked in the round. To check it, crochet a small swatch in the round with your chosen yarn and hook, then measure a 4 in (10 cm) section; if you have more stitches than 12, go up a hook size, and if you have fewer, go down.
Tips Before You Start
- Chenille yarn sheds and can be tricky to rip out, so count your stitches at the end of every stripe band rather than waiting until the end of the tube.
- Work in continuous spirals and move your stitch marker at the start of each round so your color changes stay in a neat line up the back of the pillow.
- Change colors on the last pull-through of the final stitch of a round so the new stripe starts cleanly with no gap.
- Stuff the body firmly but not rock-hard before closing the second end, adding small handfuls at a time so the filling stays even along the whole length.
Step-by-Step Instructions
Notes: Work in continuous spirals and move the marker each round. The tube is worked as one straight piece, then closed at both ends. The snout and ears are worked separately and sewn on.
Body Tube (Color A)
Setup: With A, ch 24, join with sl st to form a ring, being careful not to twist.
Rnd 1: Ch 1, sc in each ch around (24 sts).
Rnds 2-6: Sc in each st around (24 sts). Change to B.
Rnds 7-12: Sc in each st around (24 sts). Change to A.
Rnds 13-18: Sc in each st around (24 sts). Change to B.
Rnds 19-24: Sc in each st around (24 sts). Change to A.
Rnds 25-30: Sc in each st around (24 sts). Change to B.
Rnds 31-36: Sc in each st around (24 sts). Change to A.
Rnds 37-42: Sc in each st around (24 sts). Change to B.
Rnds 43-48: Sc in each st around (24 sts). Change to A.
Rnds 49-54: Sc in each st around (24 sts). Change to B.
Rnds 55-60: Sc in each st around (24 sts). Change to A.
Rnds 61-66: Sc in each st around (24 sts). Change to B.
Rnds 67-72: Sc in each st around (24 sts). Change to A.
Rnds 73-78: Sc in each st around (24 sts). Change to B.
Rnds 79-84: Sc in each st around (24 sts). Fasten off B, leaving a long tail.
Bottom Closure (Color A)
With A, join yarn at the bottom opening.
Rnd 1: Sc in each st around (24 sts).
Rnd 2: [Sc2tog] x12 (12 sts).
Rnd 3: [Sc2tog] x6 (6 sts).
Rnd 4: [Sc2tog] x3 (3 sts).
Fasten off, draw the tail through the remaining 3 sts, pull tight, and weave in.
Top Closure (Color A)
With A, join yarn at the top opening.
Rnd 1: Sc in each st around (24 sts).
Rnd 2: [Sc2tog] x12 (12 sts).
Rnd 3: [Sc2tog] x6 (6 sts).
Rnd 4: [Sc2tog] x3 (3 sts).
Fasten off, draw the tail through the remaining 3 sts, pull tight, and weave in.
Snout (Color B)
Rnd 1: MR, 6 sc (6 sts).
Rnd 2: Inc x6 (12 sts).
Rnd 3: [Sc, inc] x6 (18 sts).
Rnds 4-5: Sc in each st around (18 sts).
Fasten off, leaving a long tail for sewing. Lightly stuff the snout.
Ears (Make 2, Color B)
Rnd 1: MR, 4 sc (4 sts).
Rnd 2: [Sc, inc] x2 (6 sts).
Rnd 3: [Sc, inc] x3 (9 sts).
Rnd 4: Sc in each st around (9 sts).
Rnd 5: [Sc2tog] x4, sc (5 sts).
Fasten off, leaving a long tail. Do not stuff.
Assembly and Finishing
Stuff the body tube firmly and evenly along its full length, then close the second end if you have not already done so. Sew the snout to the body at one end of the tube, centered on the face, approx. 3 in (7.5 cm) from the top closure. Sew the ears to the body above the snout, approx. 2 in (5 cm) apart, with the tips pointing outward. Embroider two small nostrils on the snout with Color A. Weave in all ends. Gently steam or lightly spritz and pat the pillow into shape to block it, taking care not to flatten the stuffing.
Pro Tips and Variations
- Swap the stripe colors for any two shades you love, or work wider 12-round bands for a bolder, more graphic look.
- Add a small curly pipe-cleaner tail at the back for extra pig character.
- Use a slightly smaller hook for the snout and ears so they hold their shape crisply against the soft body.